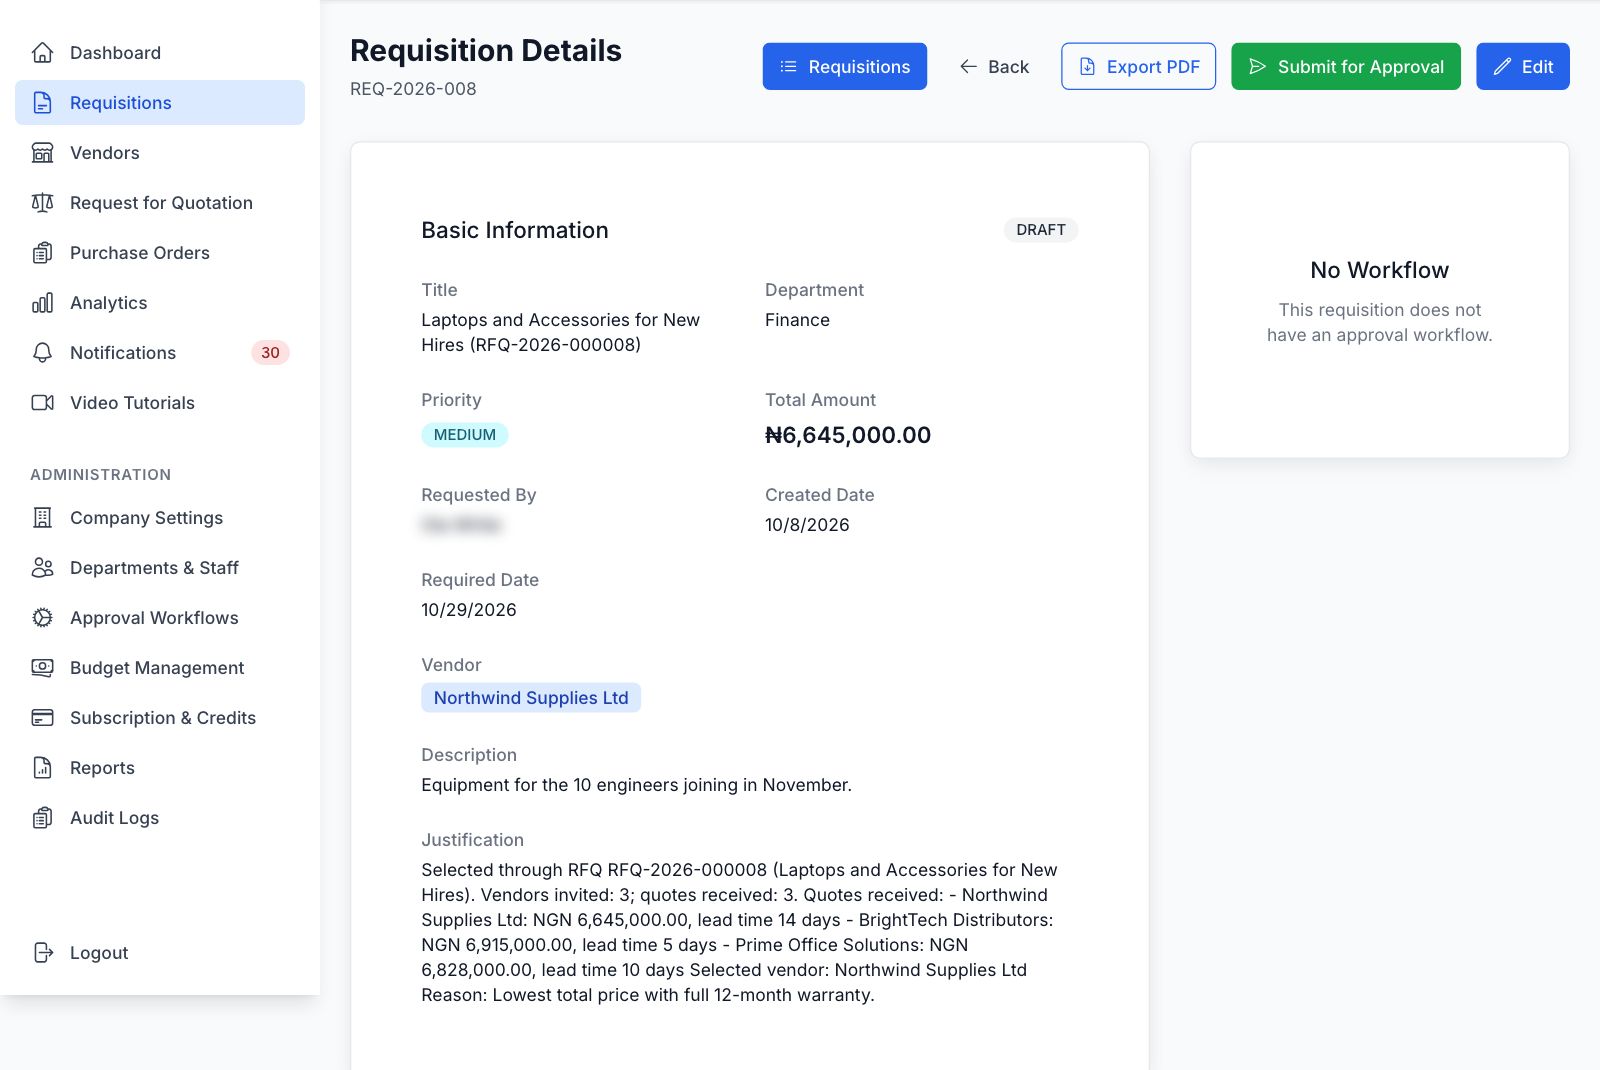
Create your company account
Registration is a short three-part form: Company Info, Admin Account, and Review & Confirm.
- Company Name — the name your team and vendors will see.
- Company Subdomain — your unique .requisitionpro.com web address. (e.g. abcltd.requisitionpro.com)
- Industry & Company Size — optional, used to personalize setup.
- Admin Account — your name, work email, and password.
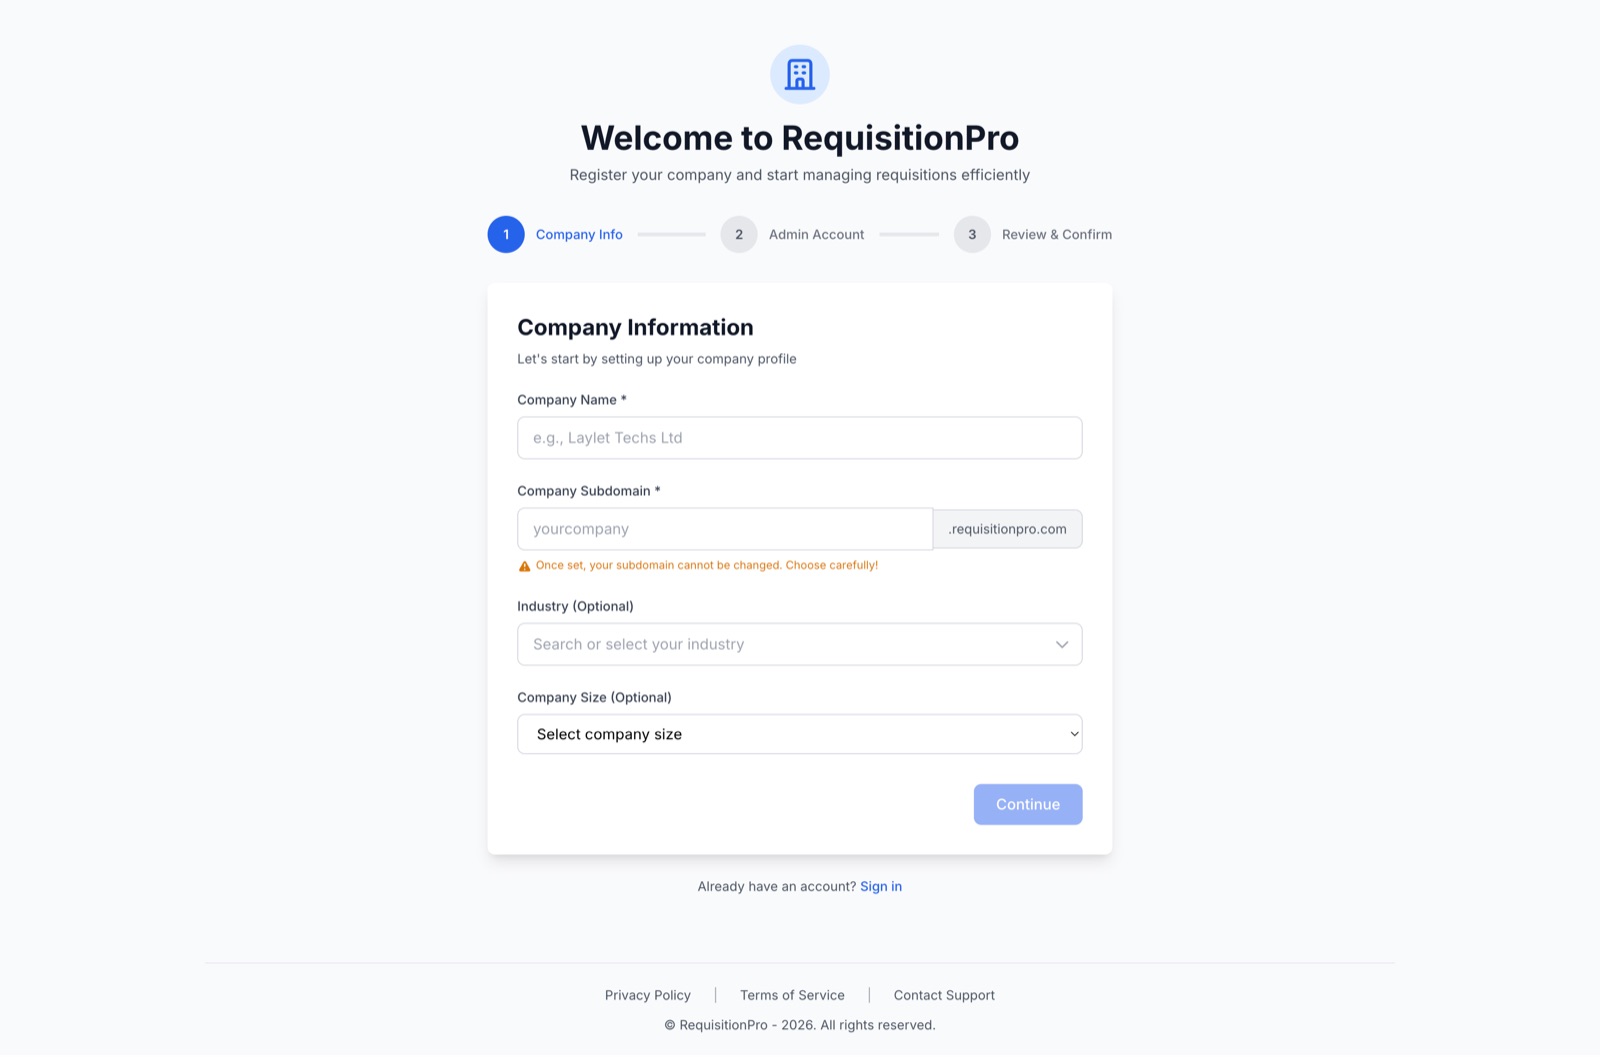
Review, agree, and create your account
Check your company and admin details, agree to the Terms of Service and Privacy Policy, and choose whether to receive product updates.
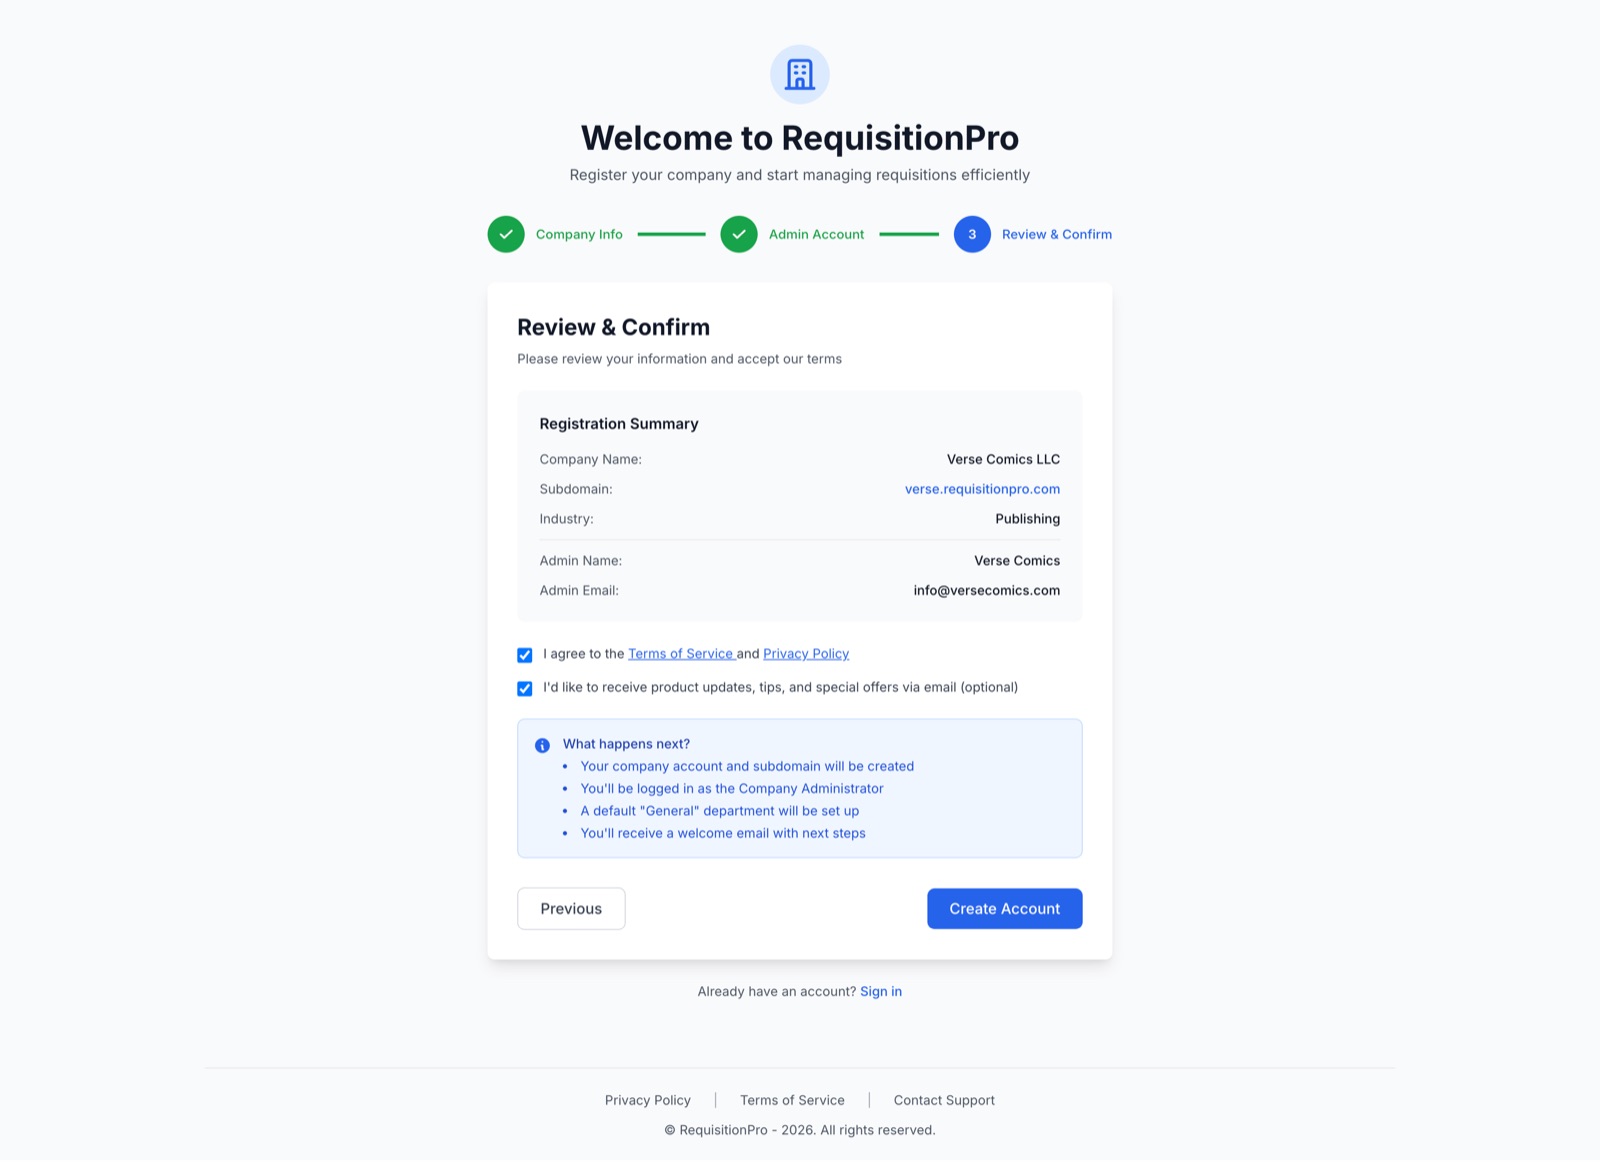
Sign in to your workspace
Once your account is created, sign in any time using your email and password. Check "Remember me" to stay signed in on a trusted device, or use "Forgot your password?" if you ever need a reset.
Explore your dashboard
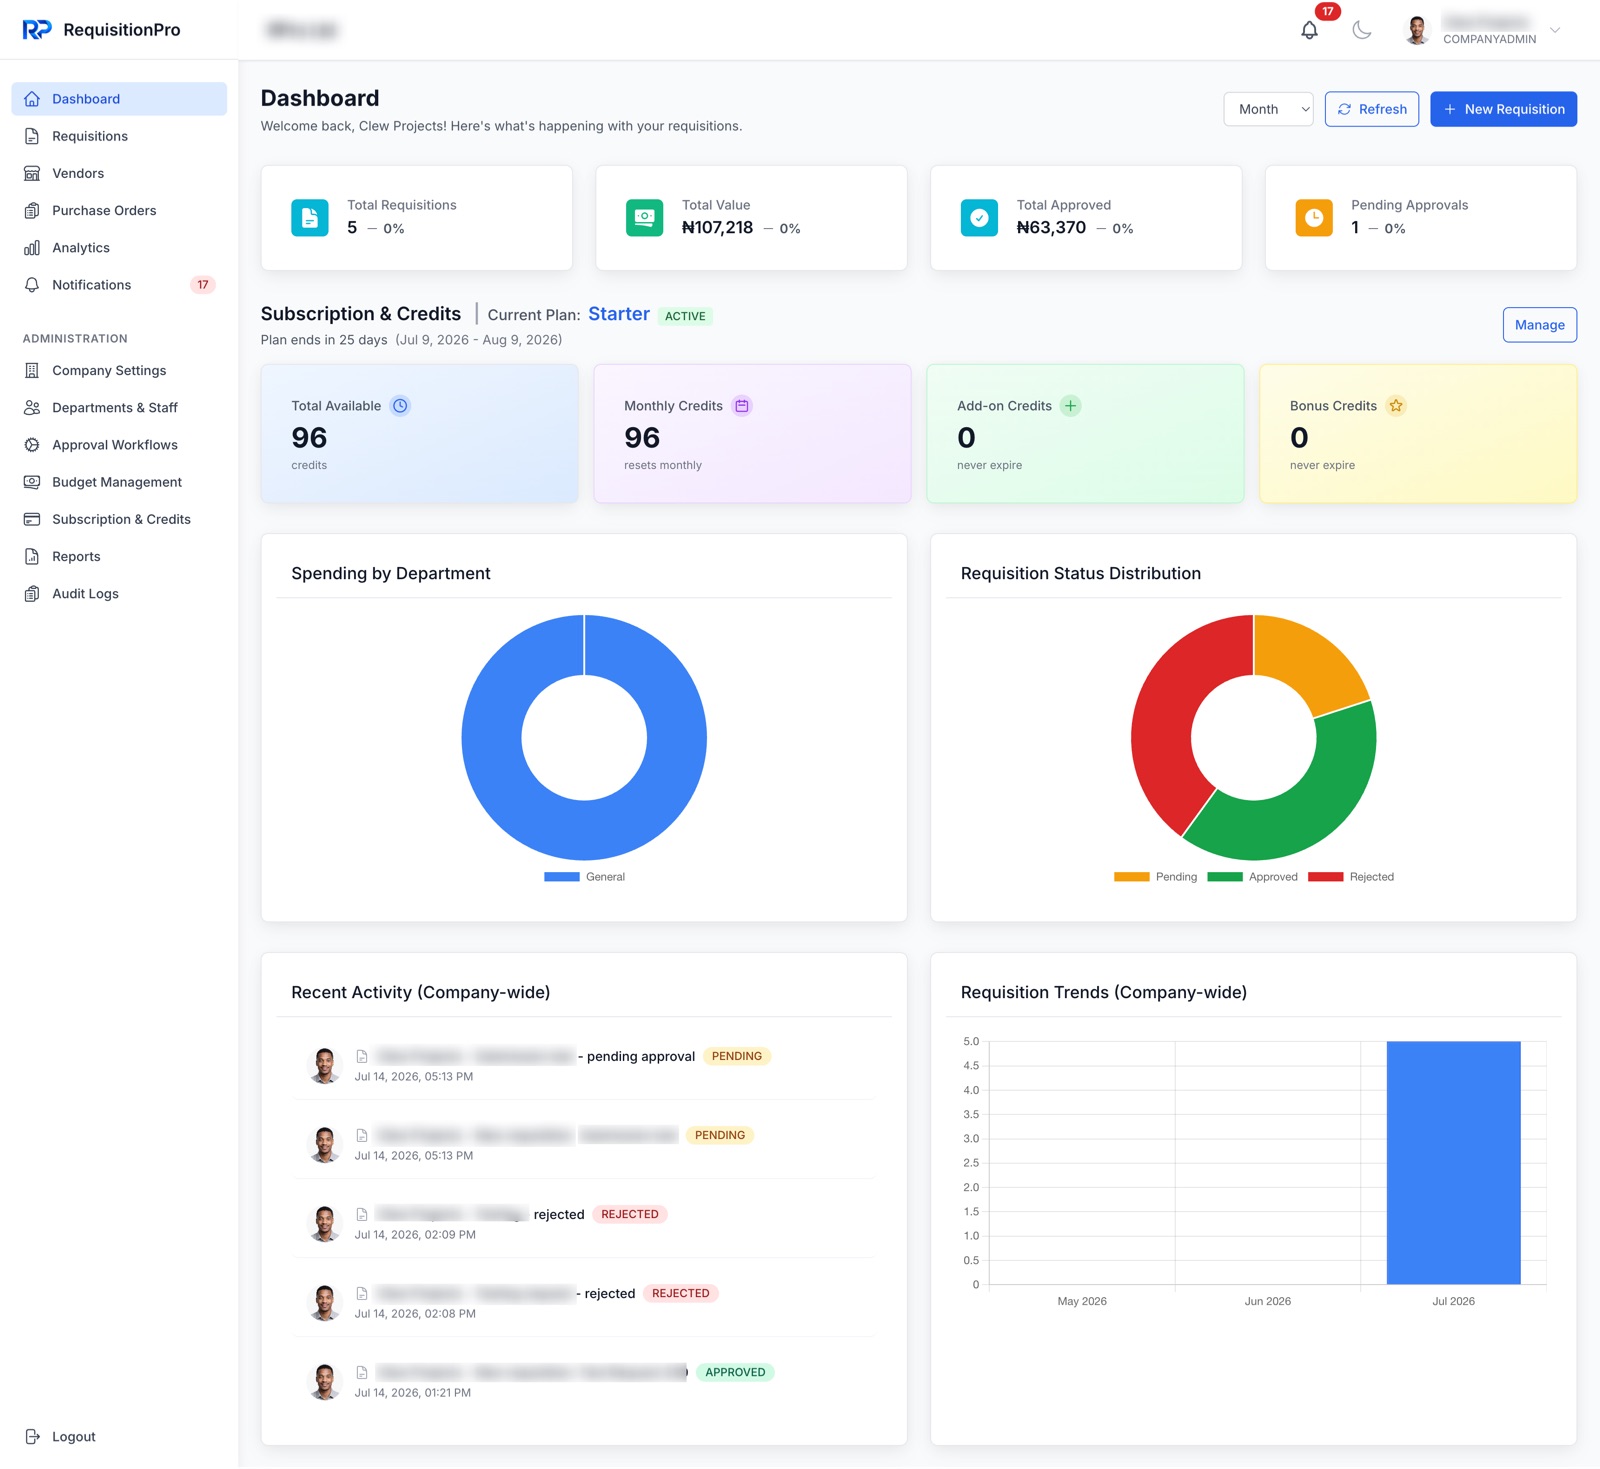
After signing in, you'll land on the Dashboard — your home base for what's happening across the organization.
- Navigation — Requisitions, Vendors, Purchase Orders, Analytics, and an Administration section.
- Summary cards — total requisitions, value, approvals, and pending items at a glance.
- Charts — spending by department and requisition status distribution.
- New Requisition — the blue button starts a new request from anywhere.
Configure your company profile
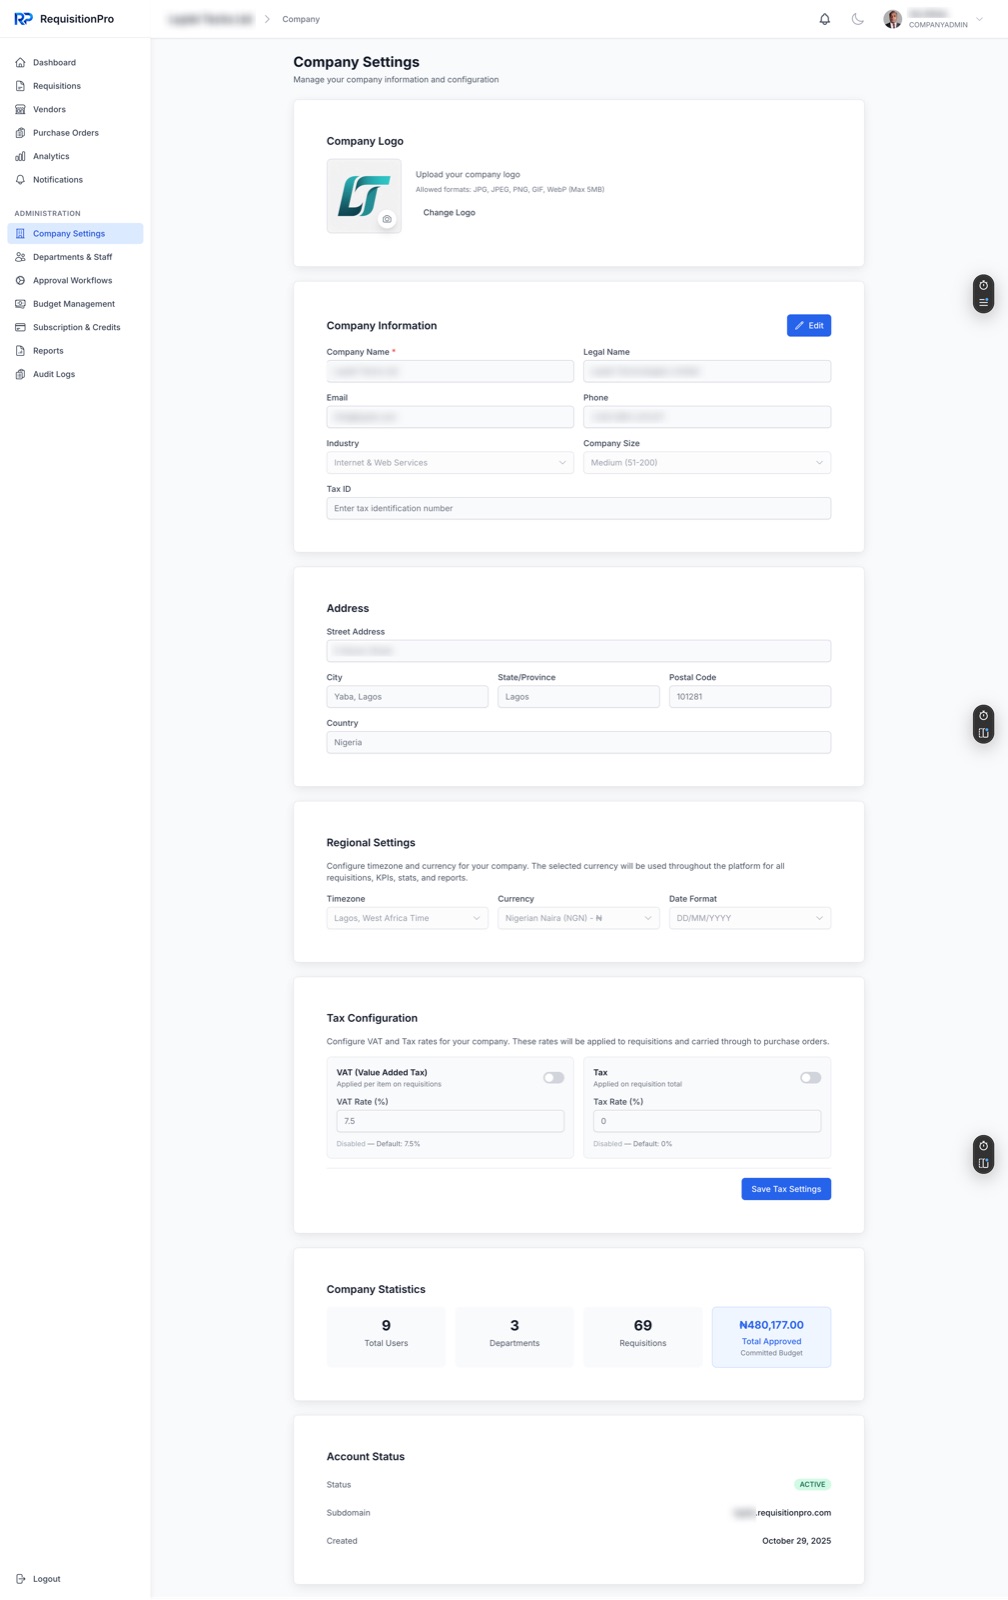
Before inviting your team, go to Company Settings under Administration and complete your company's profile and regional configuration.
- Company Information — legal name, contact email and phone, industry, company size, and tax ID.
- Address — your registered street address, city, state/province, postal code, and country.
- Regional Settings — the timezone, currency, and date format used across requisitions, KPIs, and reports.
- Tax Configuration — VAT and tax rates applied to requisitions and carried through to purchase orders.
Set up departments and invite your team
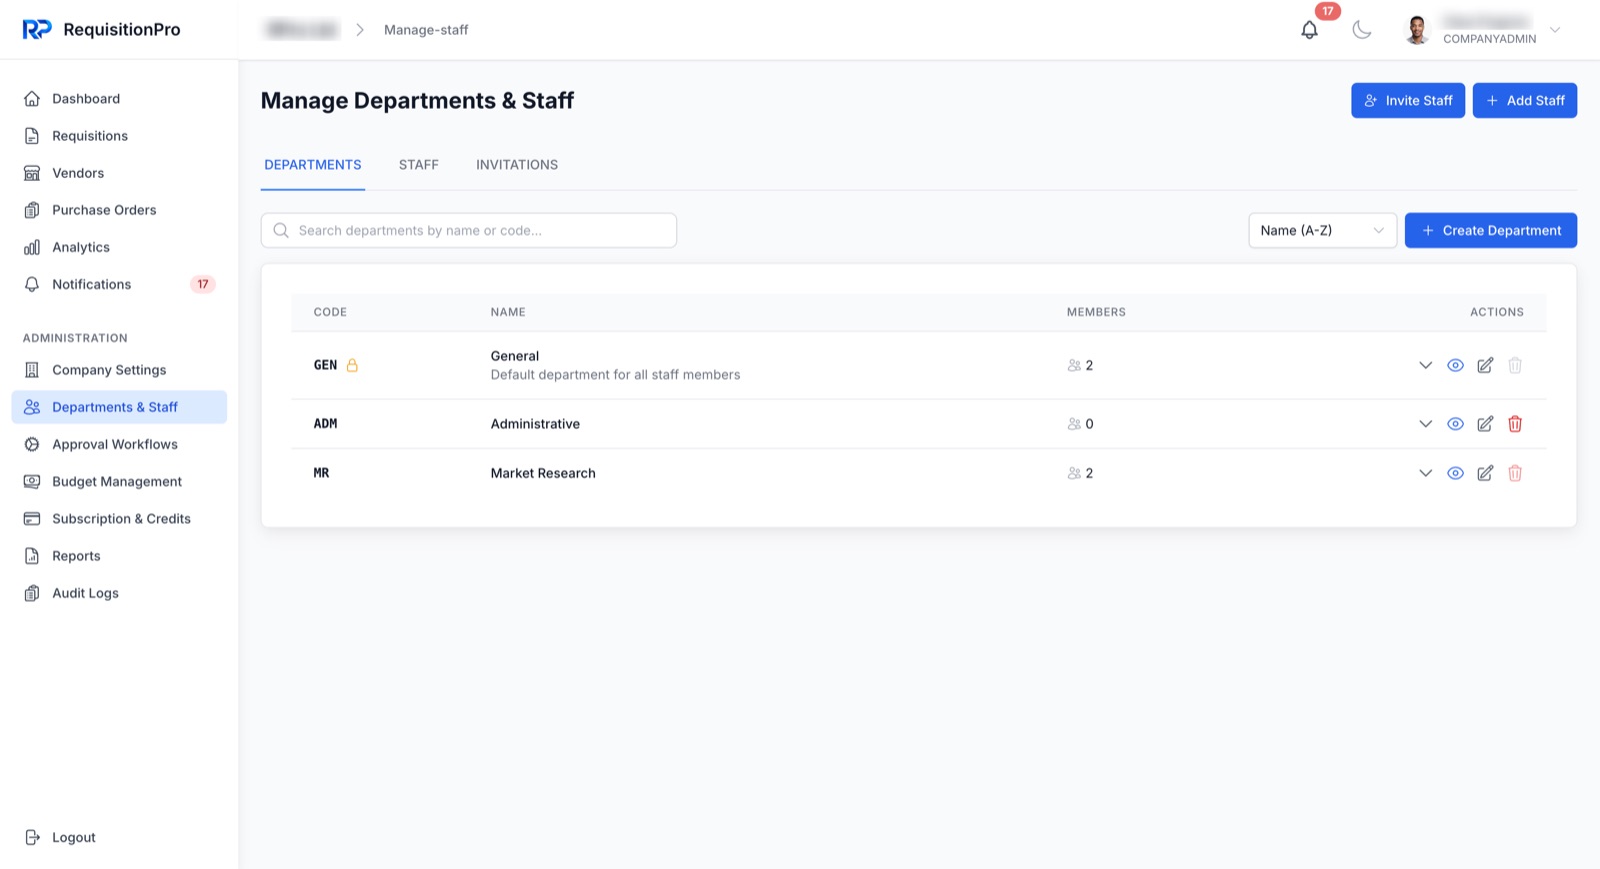
Go to Departments & Staff. Your workspace starts with a default "General" department — add the teams or cost centers that reflect your organization, then invite staff and assign one of three roles:
- Company Admin — full access to settings, users, departments, and workflows.
- Department Head — manages a department's staff and often approves its requests.
- User — submits requisitions and tracks their own requests.
Approvers aren't a separate role: anyone you name on a workflow step (a specific person, a department head, or a role) approves the requests that reach that step.
Review each teammate's access
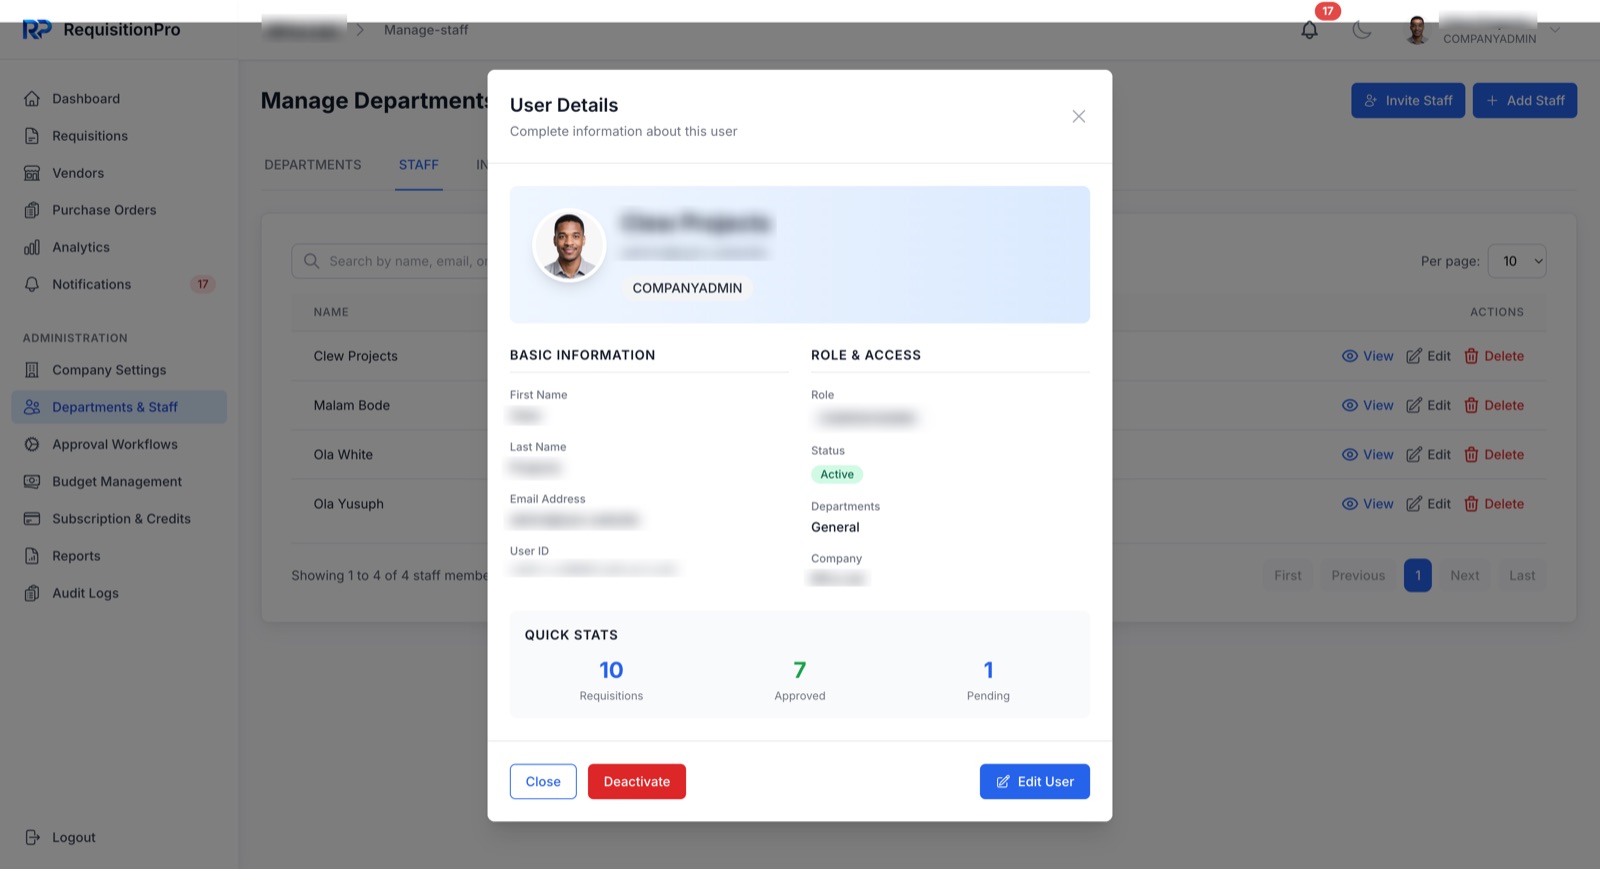
Selecting a staff member opens their User Details — role, status, department assignment, and quick stats on their requisition activity, all in one place.
Configure your approval workflow
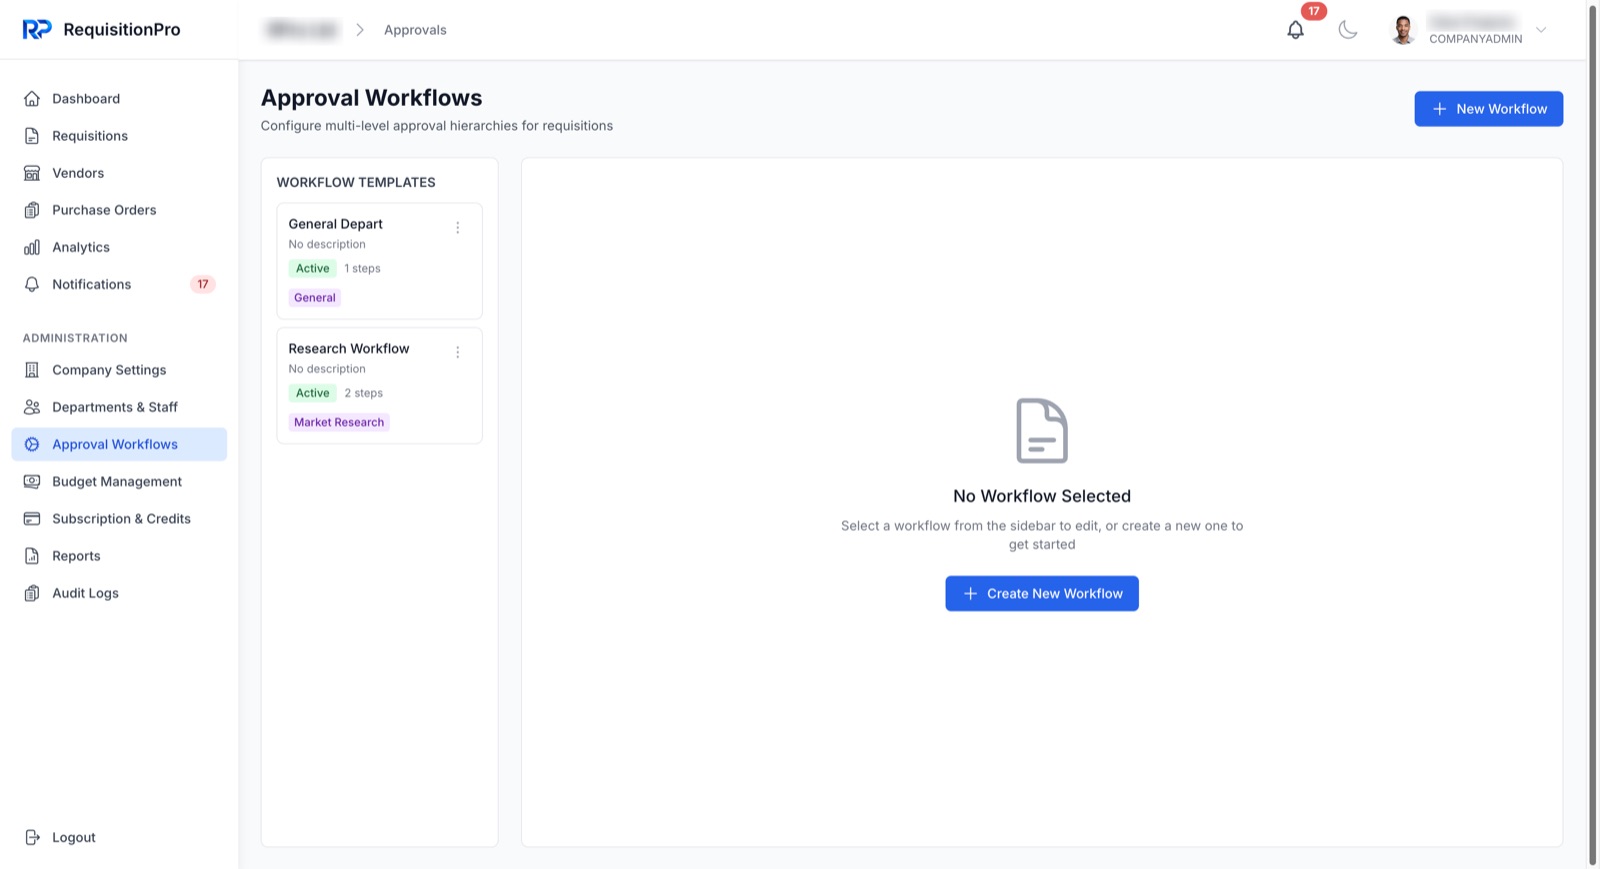
Go to Approval Workflows to define how requisitions get routed. Each department can have its own template.
- Create a workflow — build one or more approval steps.
- Assign approvers — to a specific person or a role.
- Set conditions — route differently by amount or request type.
- Activate — a workflow only applies once marked Active.
Add your vendors
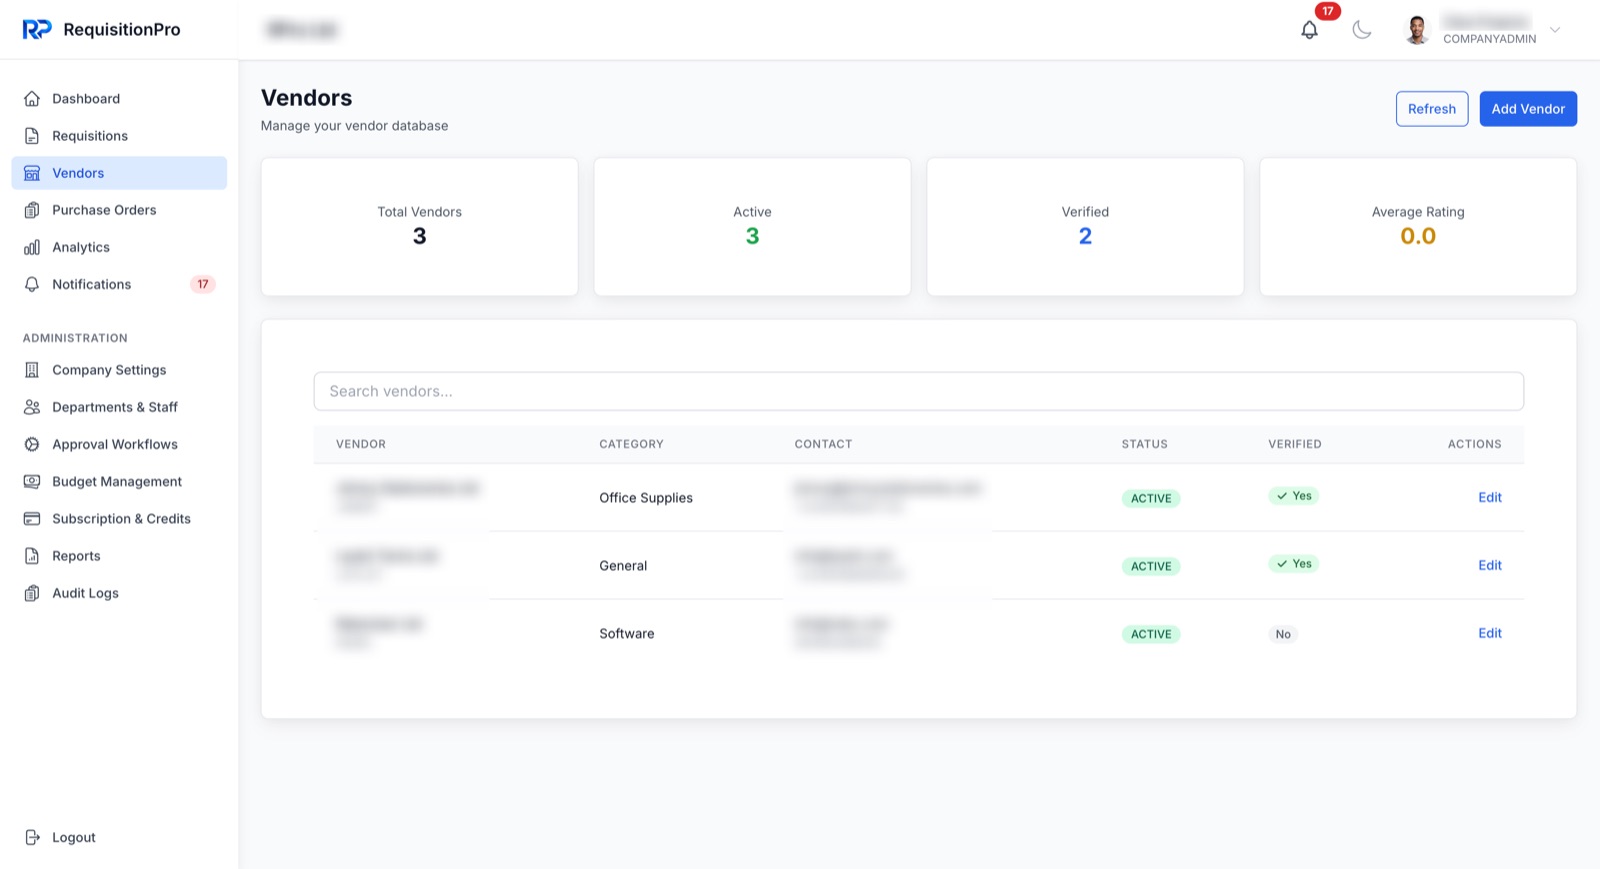
Go to Vendors to build out your supplier records. Not required to submit a requisition, but having vendors ready speeds up requisitions and purchase orders later.
- Add Vendor — name, category, contact, and payment terms.
- Verification — mark vendors Active and Verified as you confirm details.
- Link to requisitions — select a vendor directly on a request or line item.
Create your first requisition
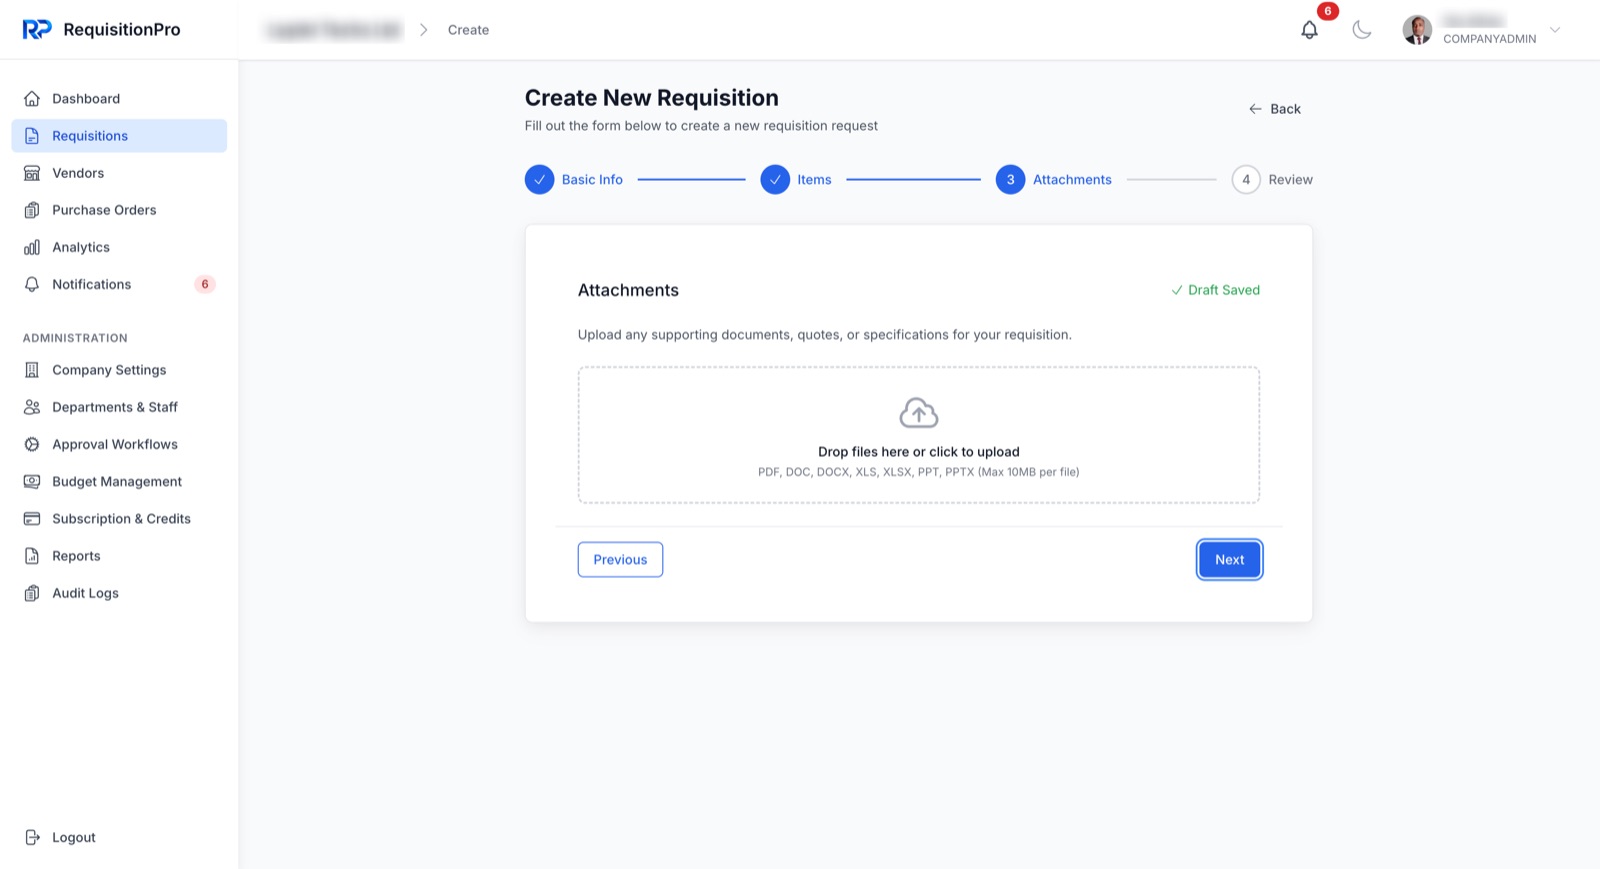
From the Dashboard or Requisitions page, select New Requisition to open the four-step request form. Your progress saves automatically as you go.
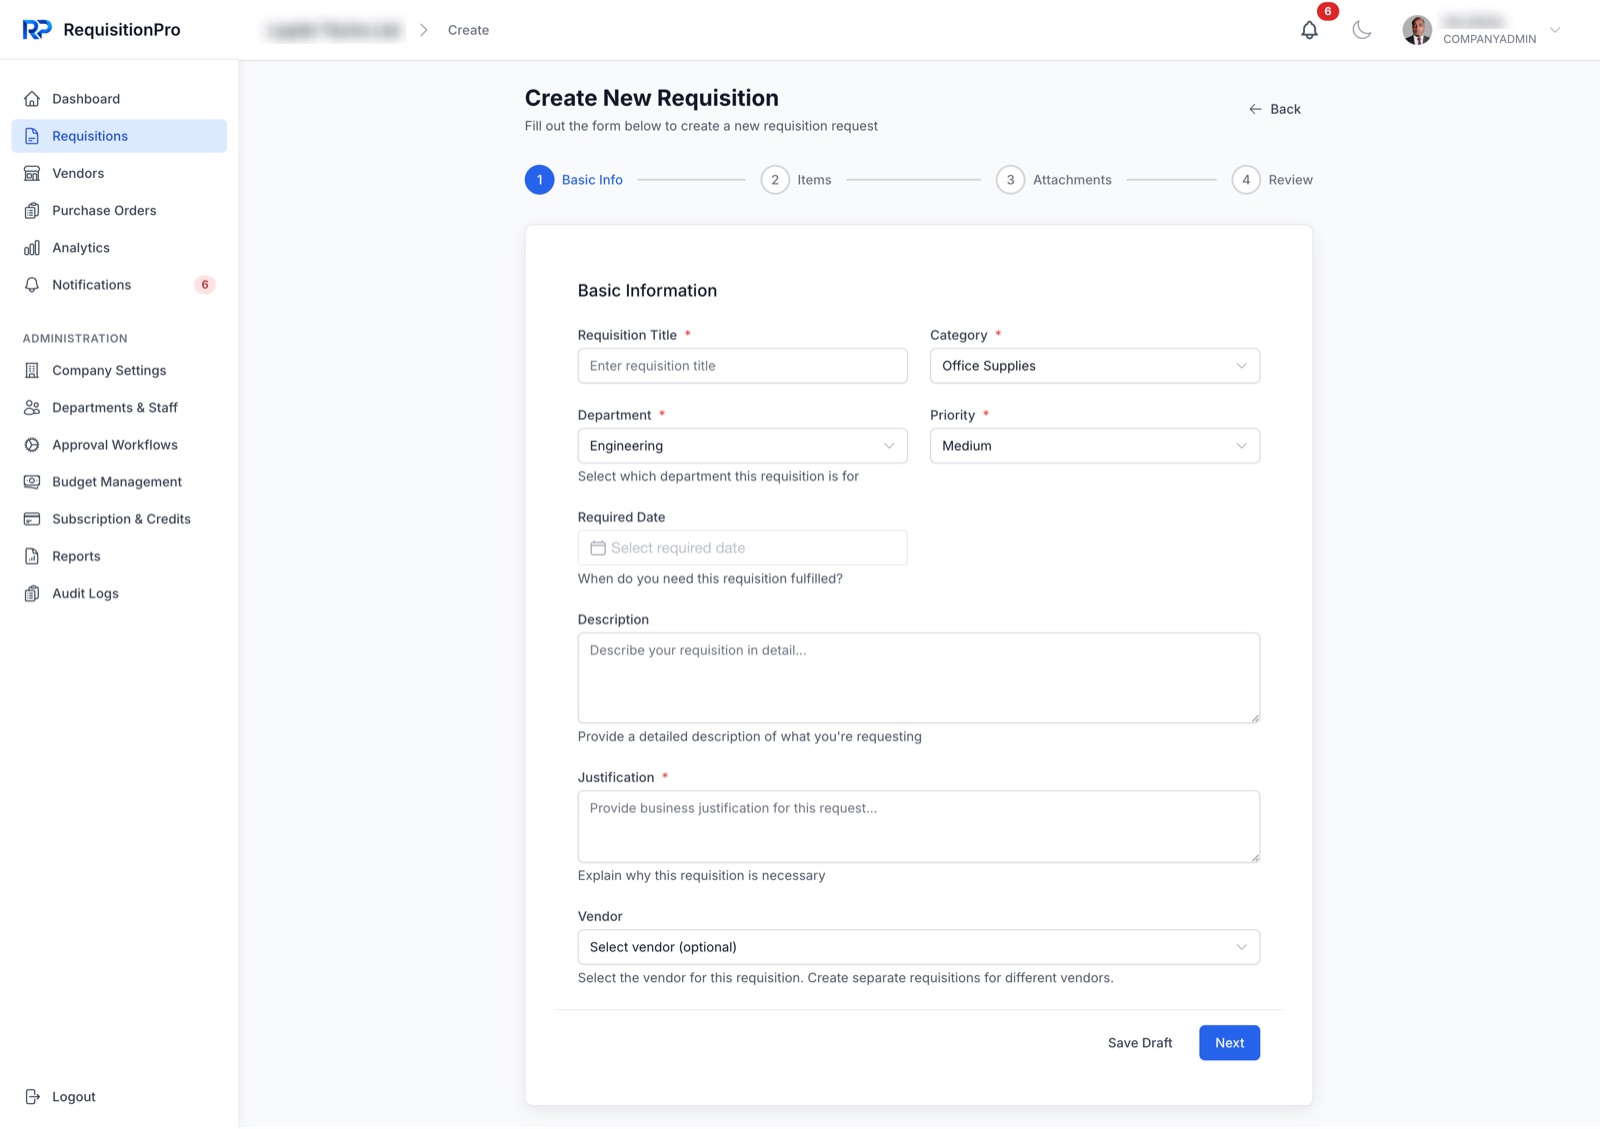
Enter a clear Requisition Title, Category, and Department, then set a Priority and, if relevant, a Required Date. Add a description and business justification, and optionally select a preferred vendor.
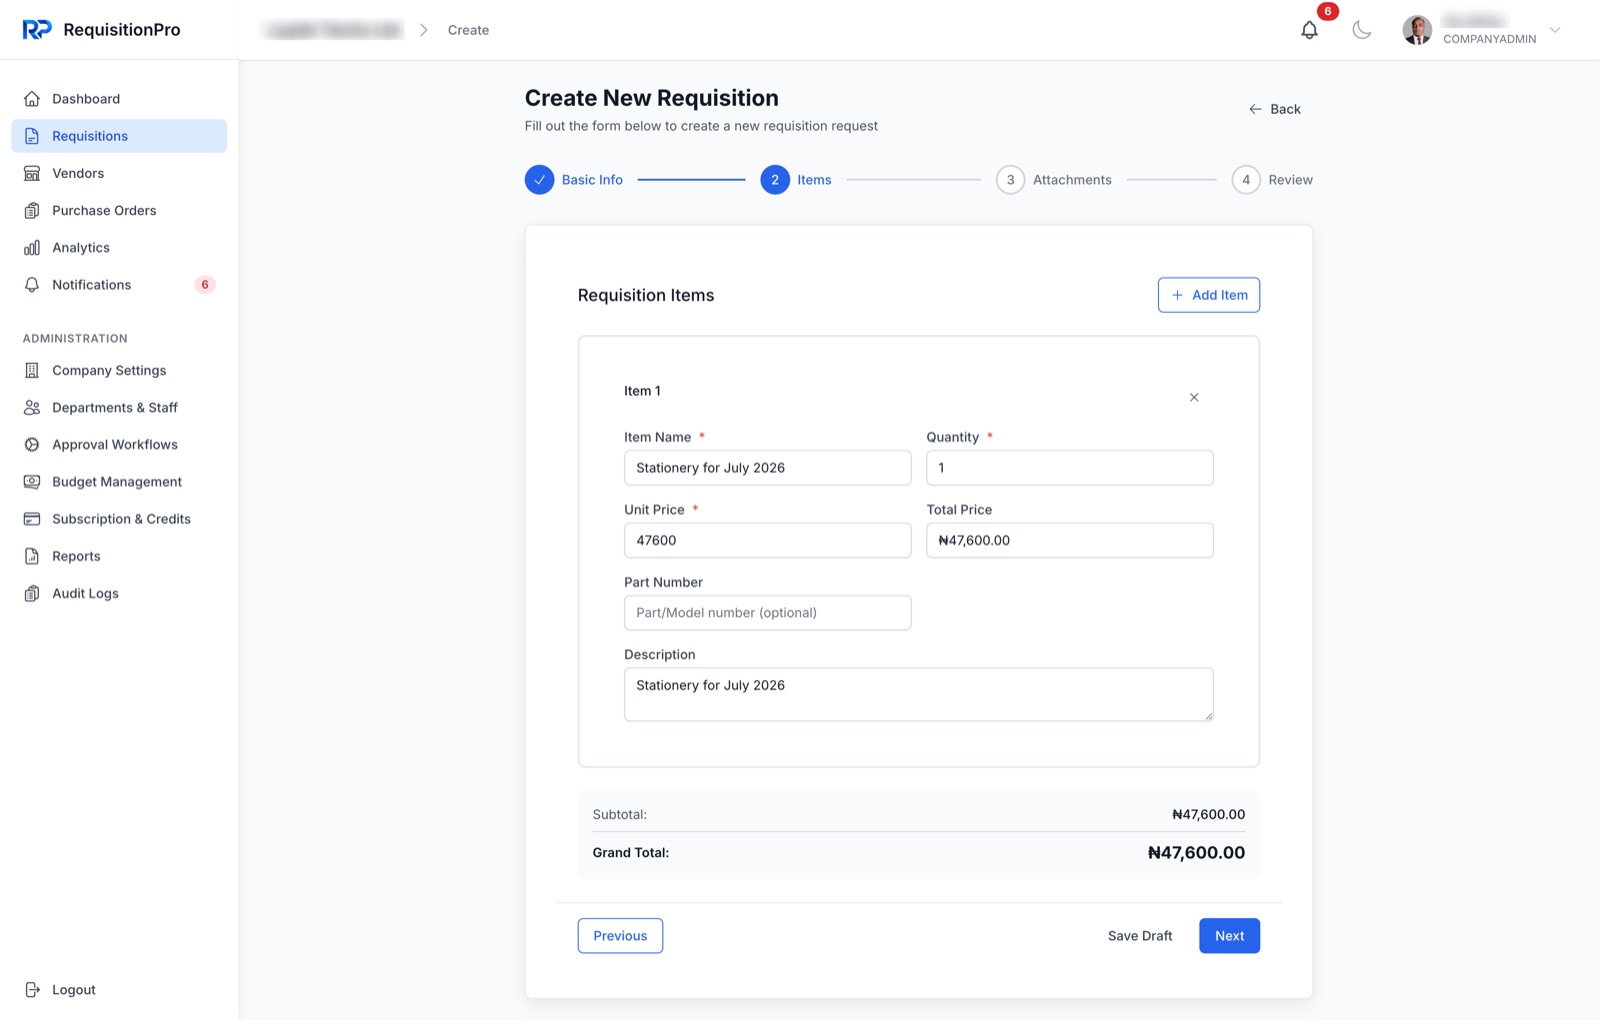
Select Add Item to list what you're requesting — item name, quantity, and unit price — with an optional part number and description. Line totals and the grand total calculate automatically.
Upload supporting documents — quotes, specifications, or vendor proposals — by dragging files in or clicking to browse. Supports PDF, DOC, DOCX, XLS, XLSX, PPT, and PPTX, up to 10MB per file.
The final step shows a full summary of your requisition. Go back to make changes, save it as a draft to finish later, or submit — sending it into your configured approval workflow.
Submit, approve, and track status
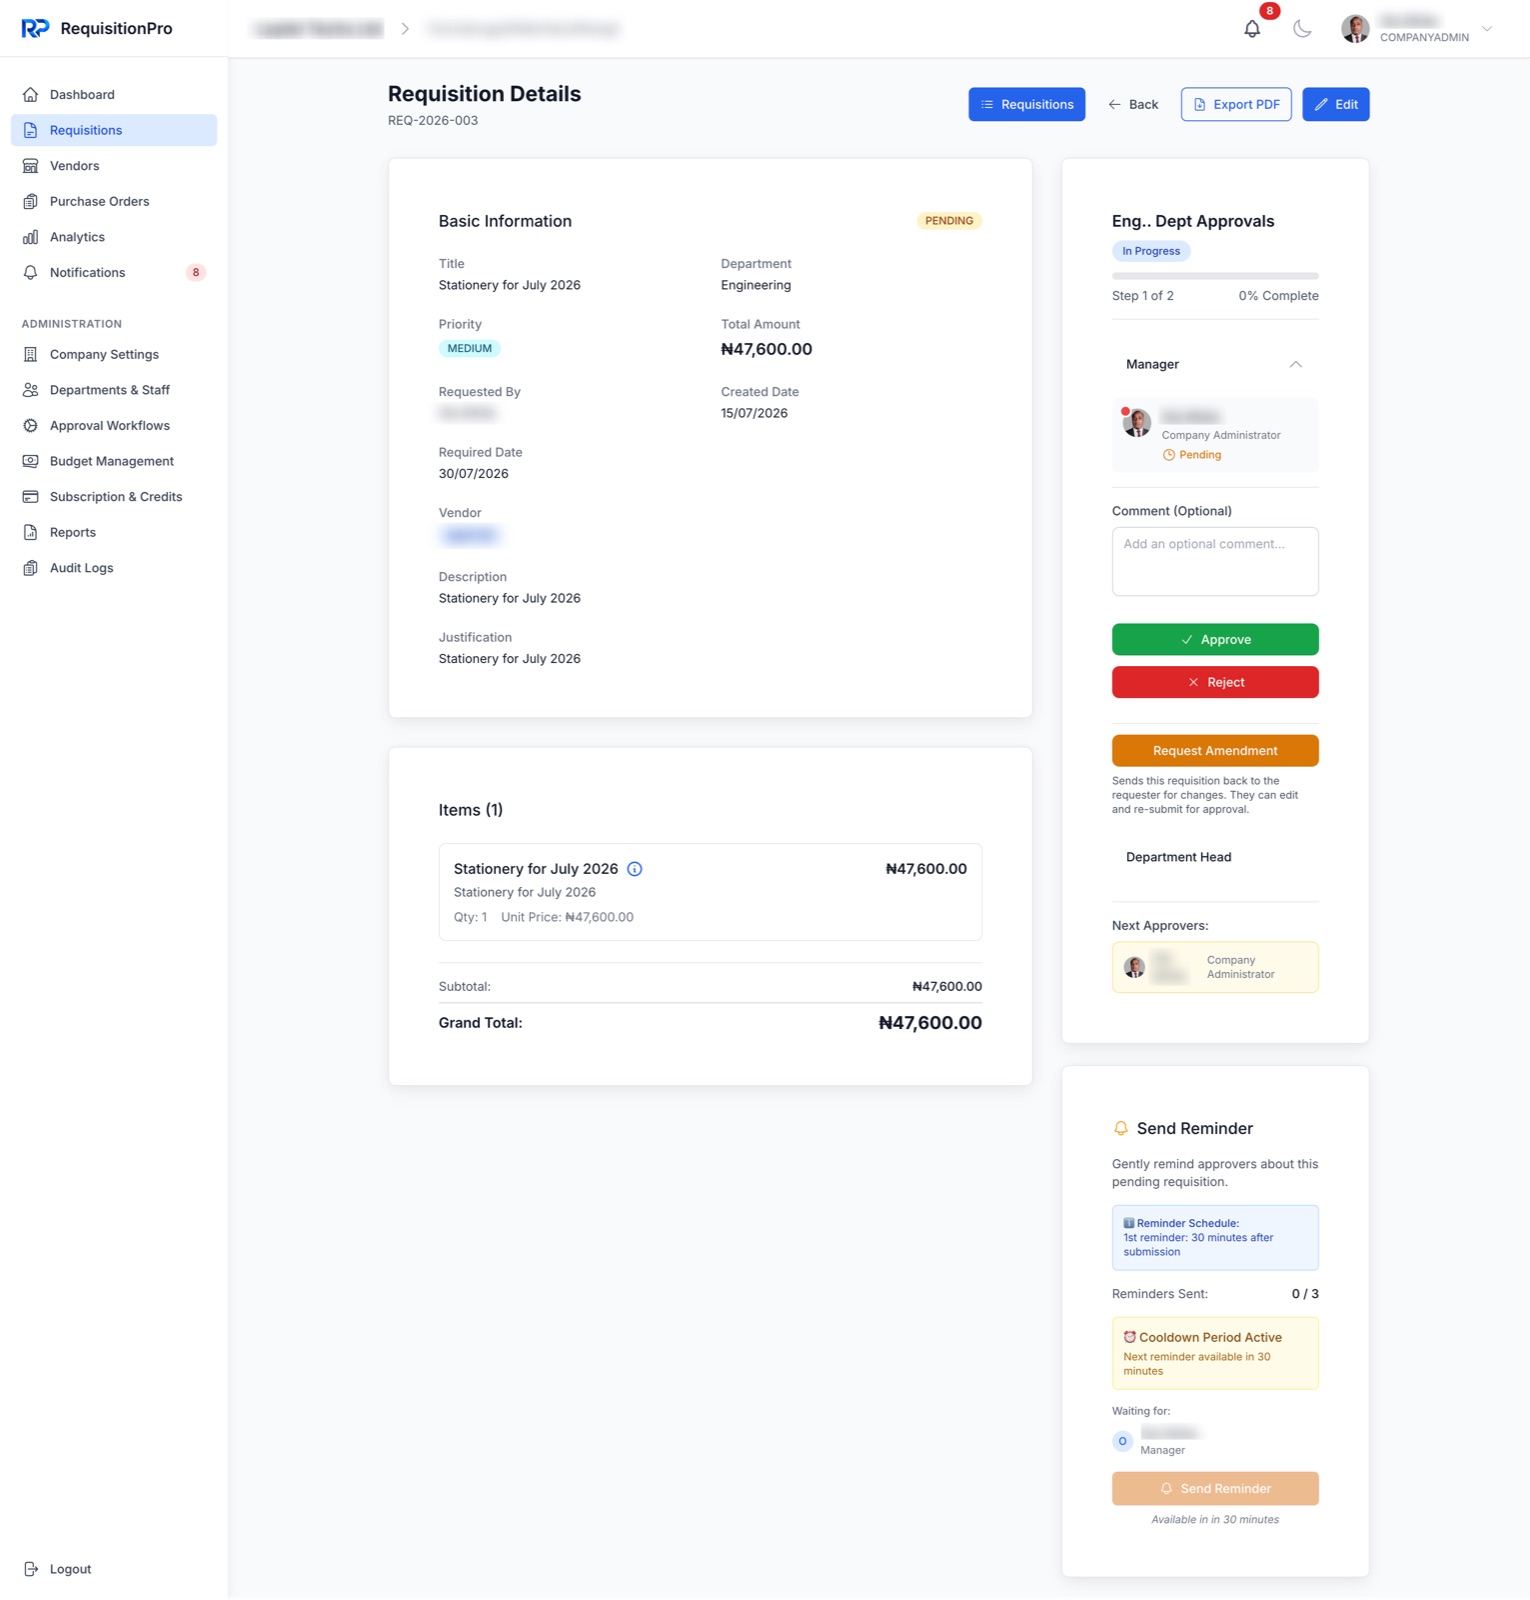
Once submitted, a requisition moves through each step of its department's workflow. Approvers see the full detail alongside an approval panel and can Approve, Reject, or Request Amendment — which sends it back to the requester with a comment. A Send Reminder option nudges an approver who hasn't yet acted.
Track every request
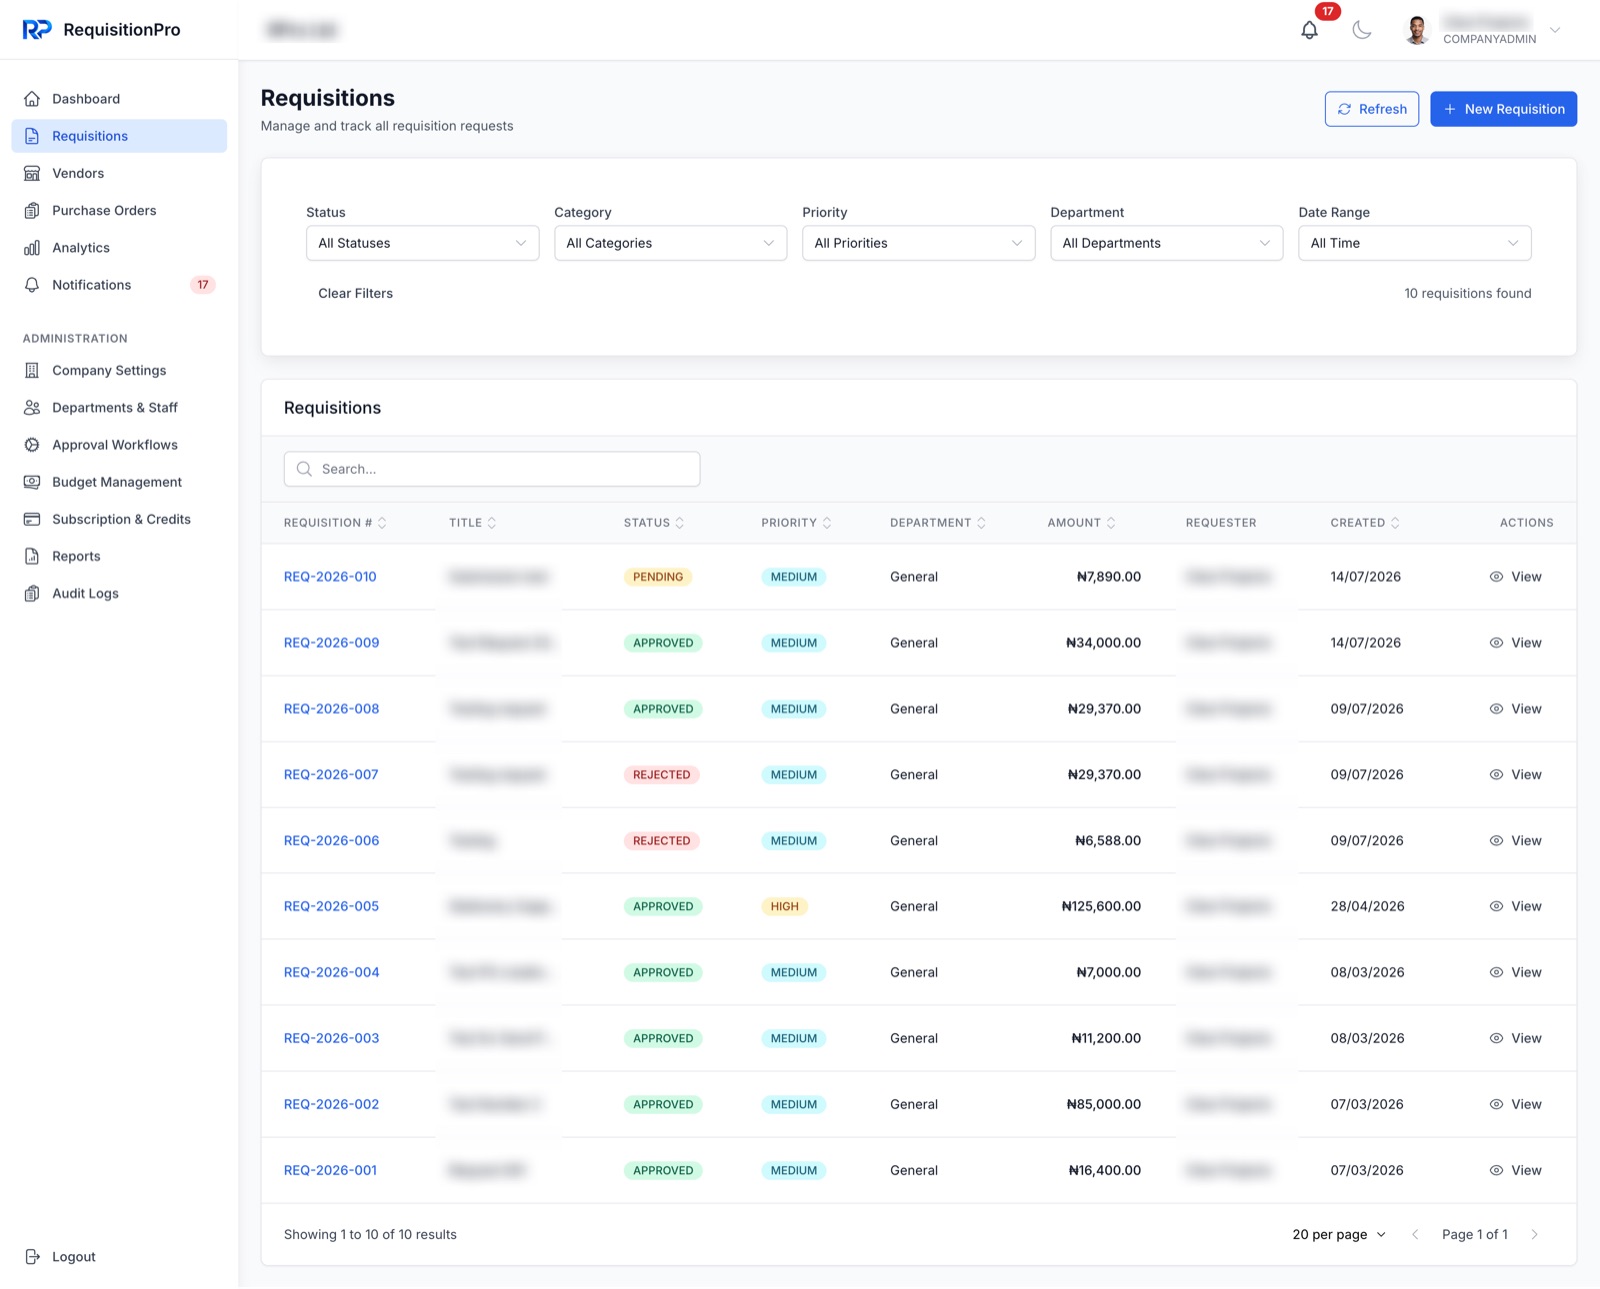
The Requisitions list shows every request with its status, priority, department, amount, and requester — filterable by status, category, priority, department, or date. Each request moves through Draft → Pending → Approved / Rejected → Completed (or Cancelled / On Hold).
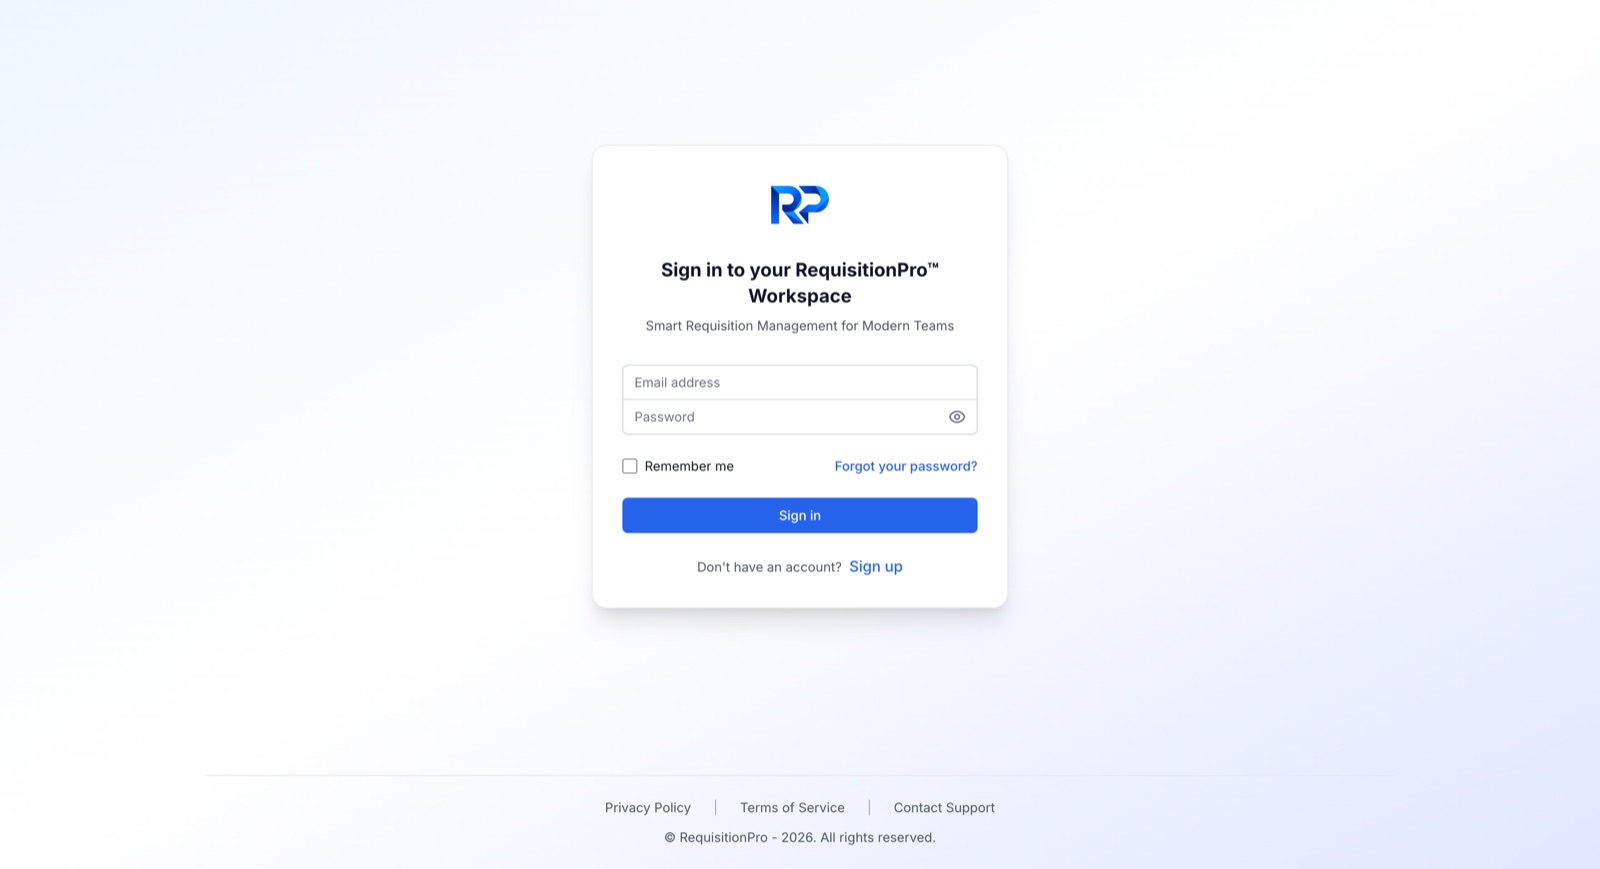
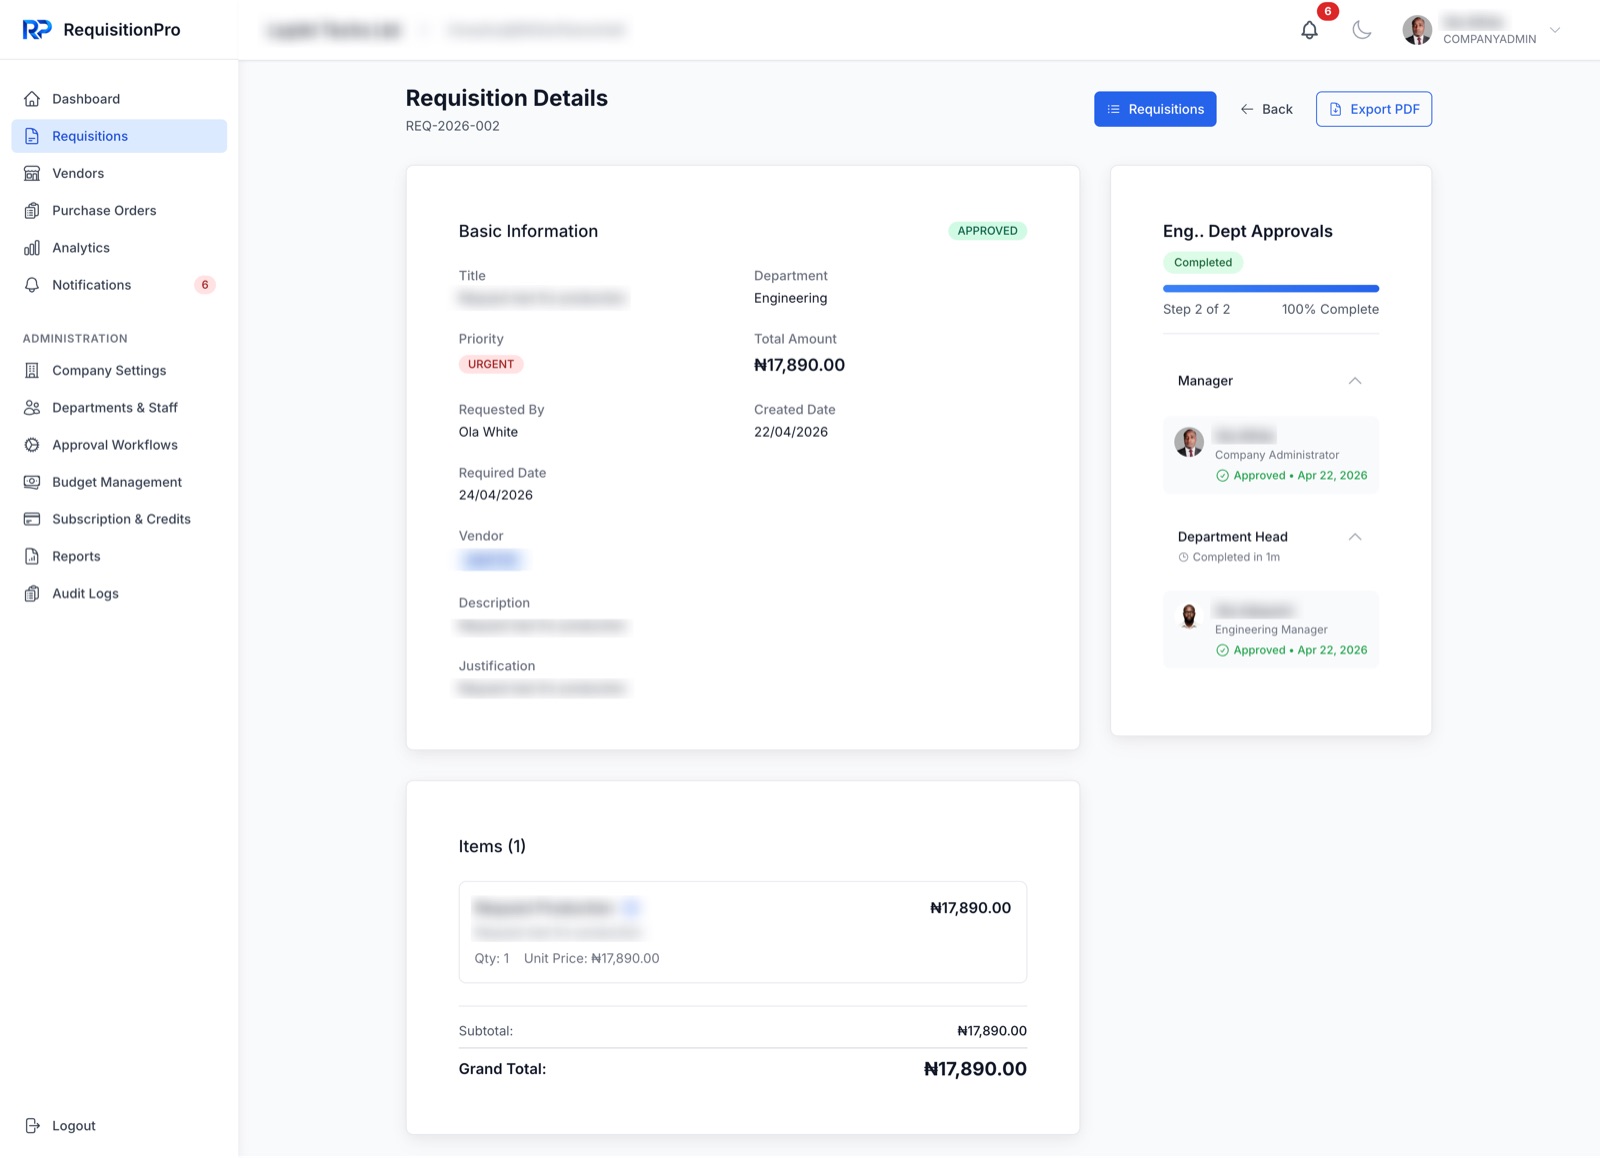
Opening any requisition shows its full detail, including the complete approval trail — who approved it, at which step, and when — plus the option to export it as a PDF.
Turn an approval into a purchase order
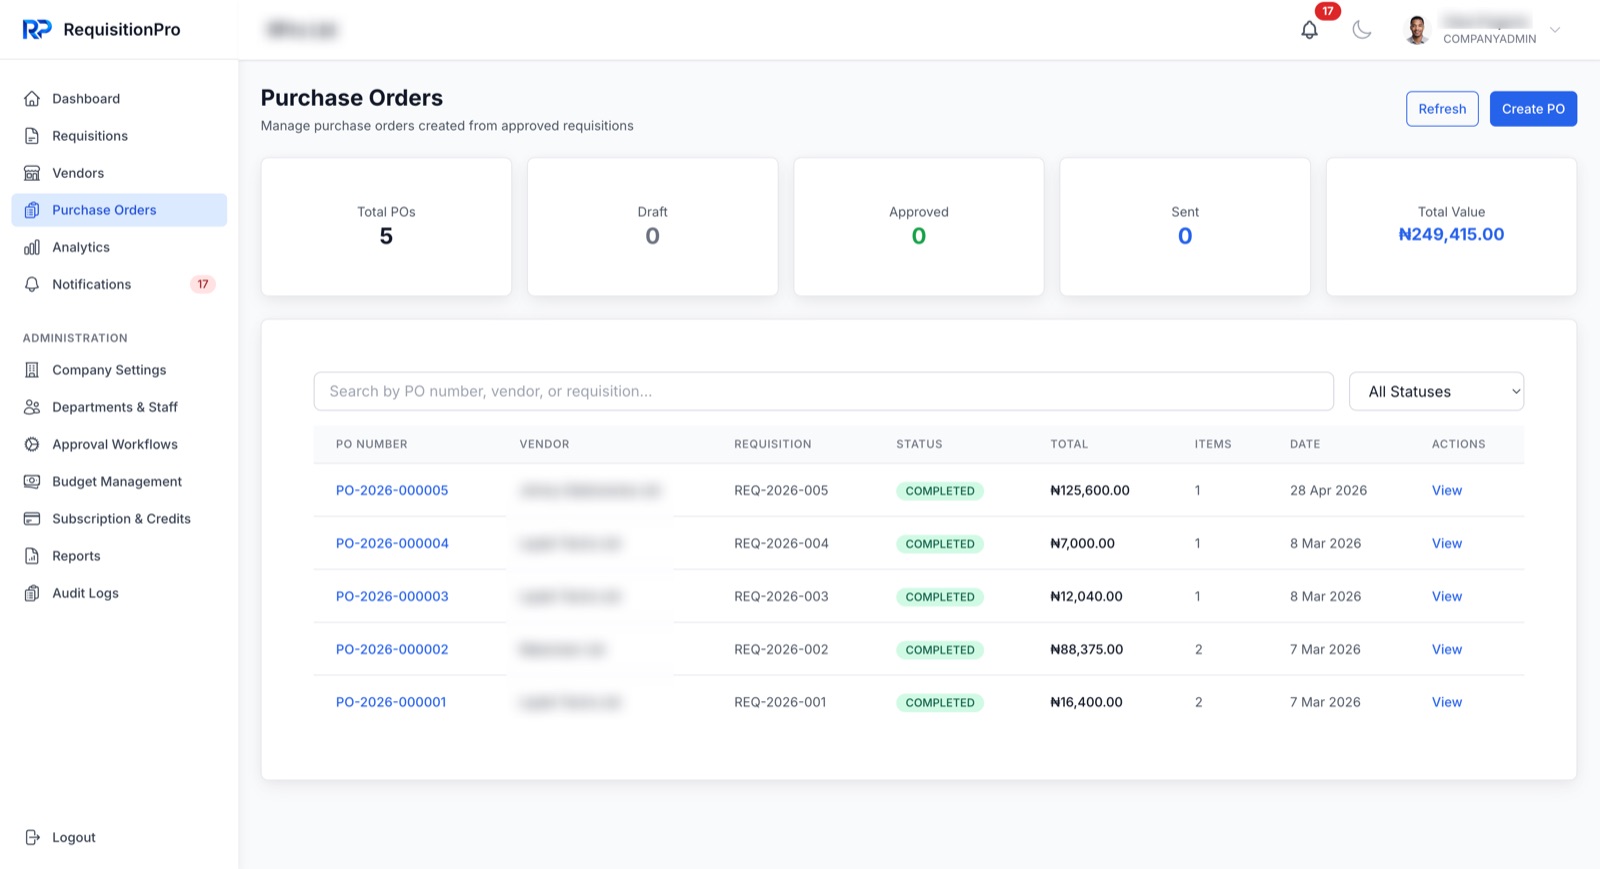
Once approved, go to Purchase Orders and select Create PO to generate one directly from the requisition — line items, quantities, and vendor details carry over automatically.
- Numbering — each PO gets a sequential company/year number.
- Status tracking — Draft → Approved → Sent → Acknowledged → Completed.
- One PO per requisition — duplicates are prevented unless the earlier PO was cancelled.
- Export — download any purchase order as a PDF for your vendor.
Not sure who to buy from? Request quotes first
Before you raise a requisition, you can ask several vendors to quote. List what you need, invite your vendors with a private link, compare their prices side by side, and award one vendor — the winning quote becomes a pre-filled requisition that follows your usual approval workflow. Available on paid plans; on the Free plan the menu item shows a lock with an upgrade prompt.
Watch the 4-minute video walkthrough · More tutorials
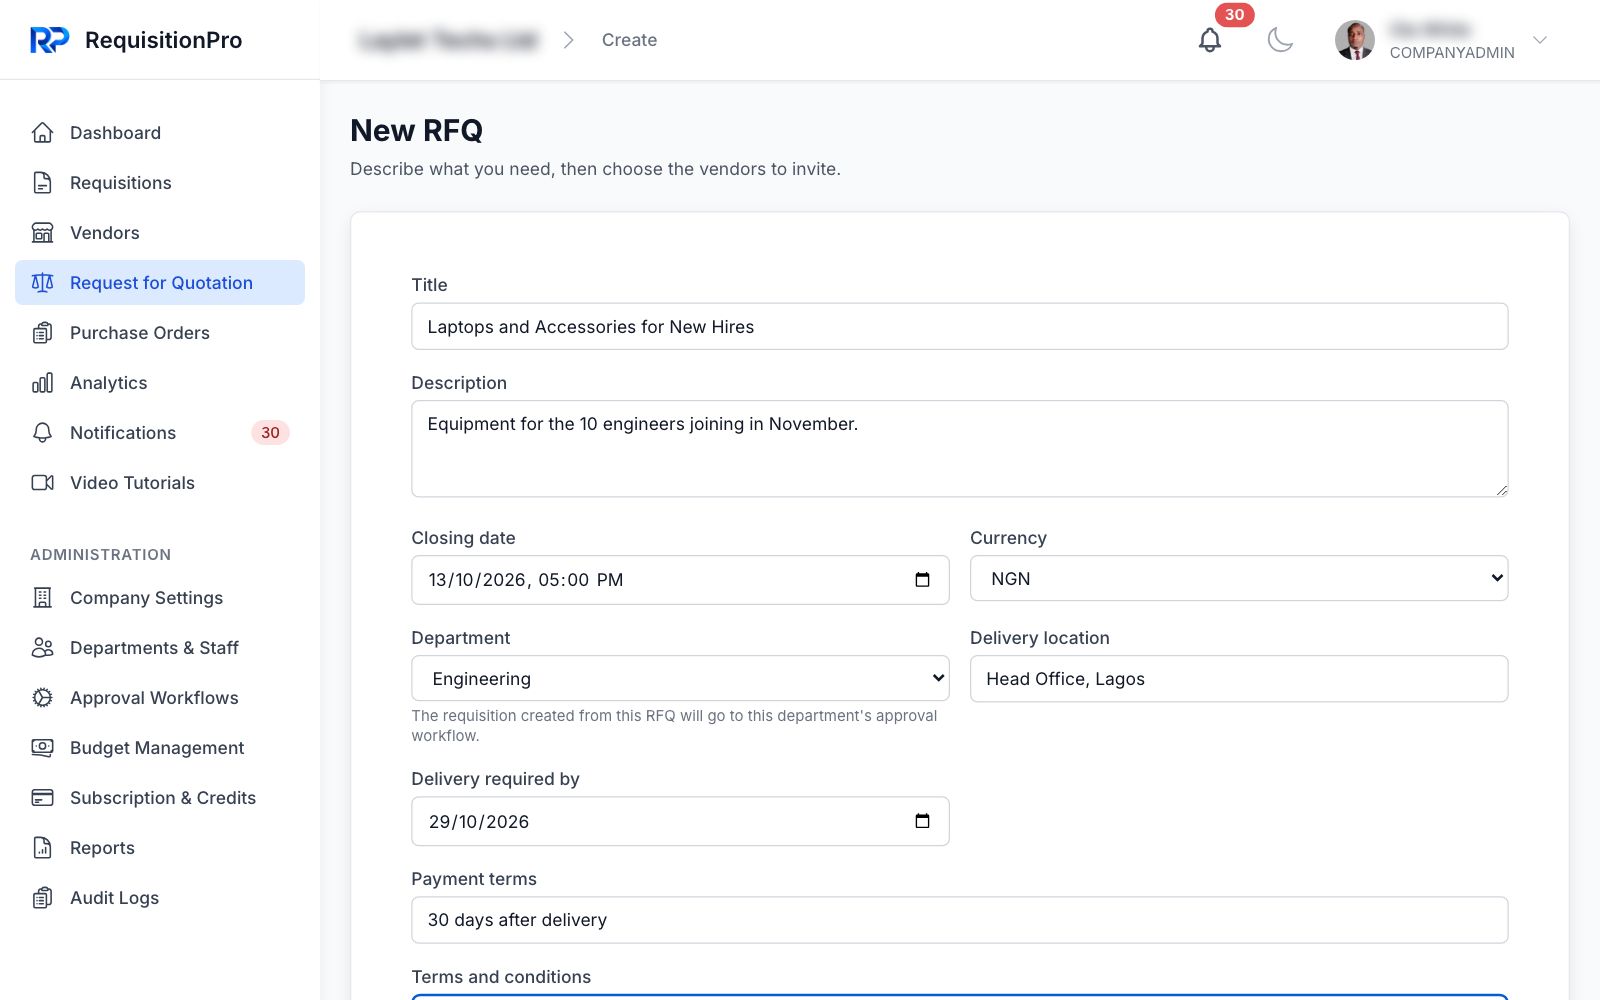
Open Request for Quotation in the sidebar and select New RFQ. Give it a clear Title, a Closing date (the vendors' deadline), the Department it is for, and where and when you need delivery. Then list what you need — item name, quantity, unit and specifications.
- Department — the requisition created from this RFQ follows that department's approval workflow.
- Items — vendors price each line, so be specific (model, size, colour).
- Anyone who can raise requisitions can raise an RFQ.
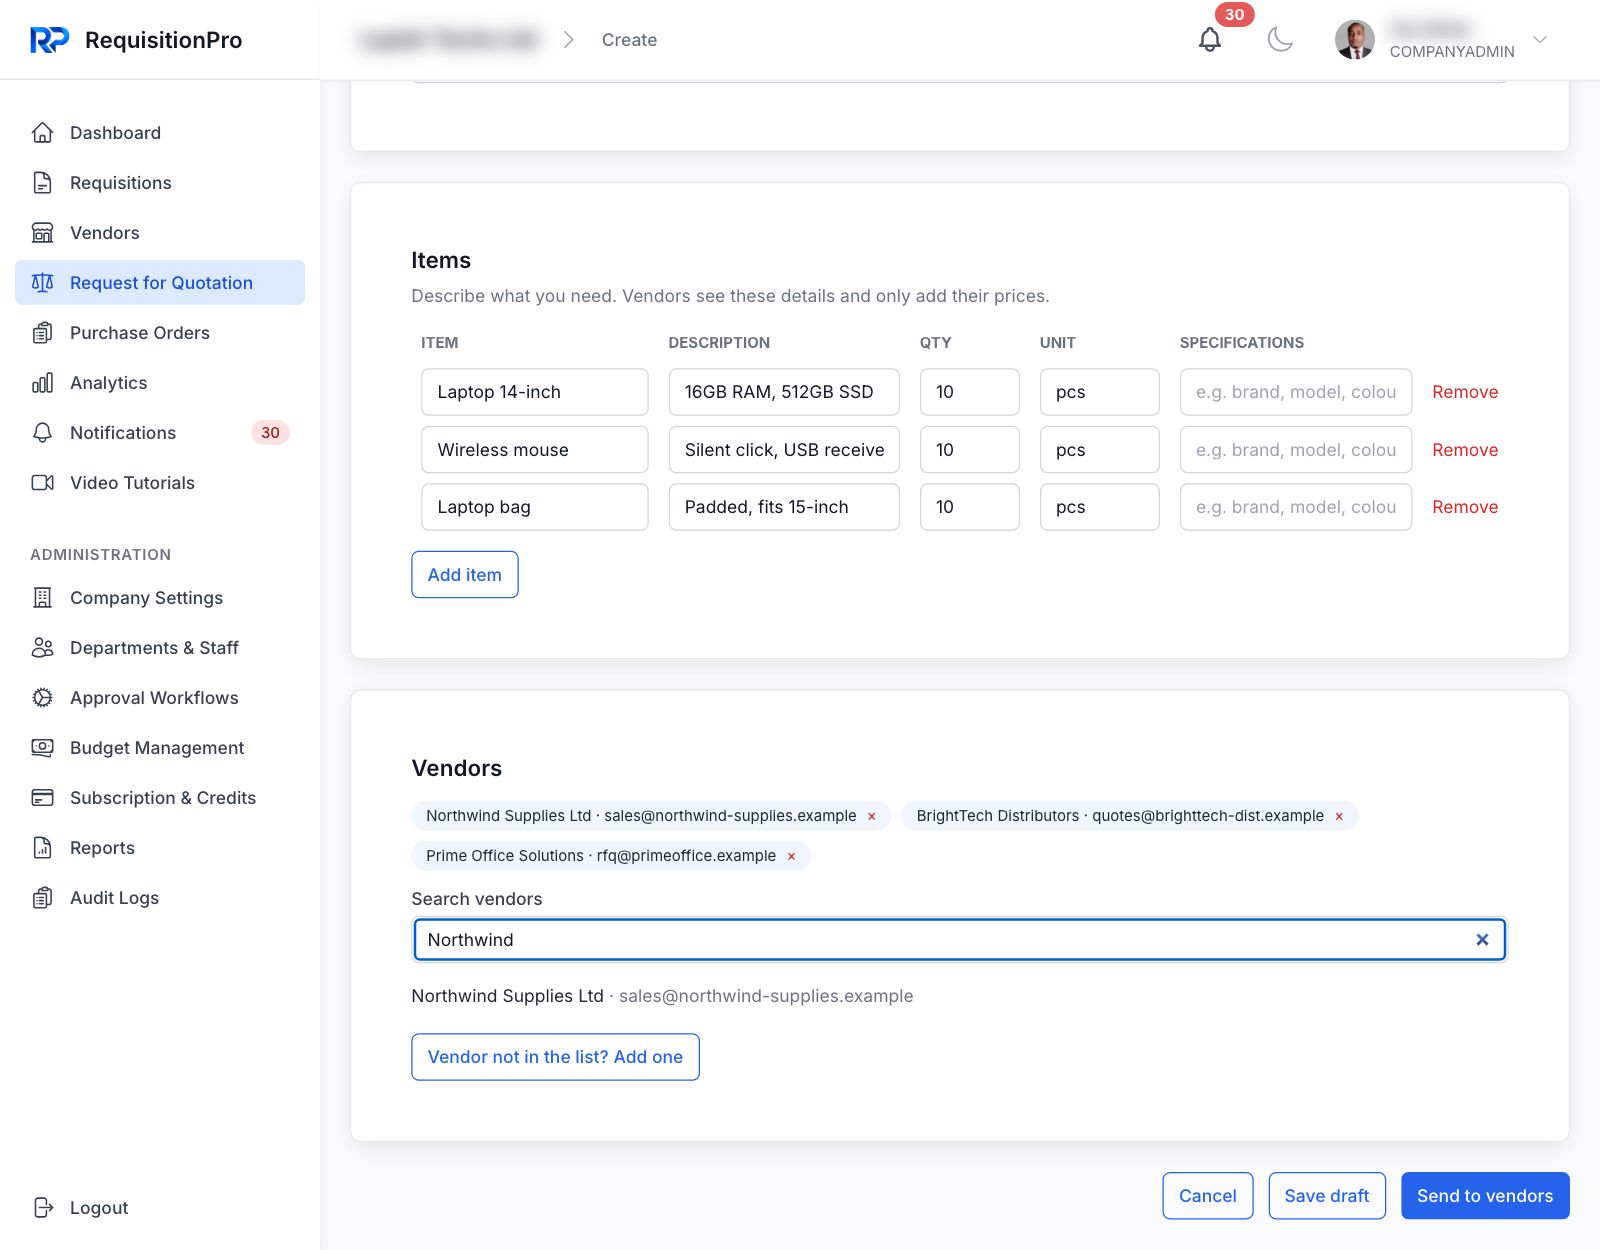
Add the vendors you want quotes from — search your vendor list and select Add, or use Vendor not in the list? Add one to create a vendor on the spot. You can invite as many as 25 vendors; one is enough if you already know your supplier.
Choose Save draft to finish later, or Send to vendors. Each vendor receives an email with their own private link — no account or login needed.
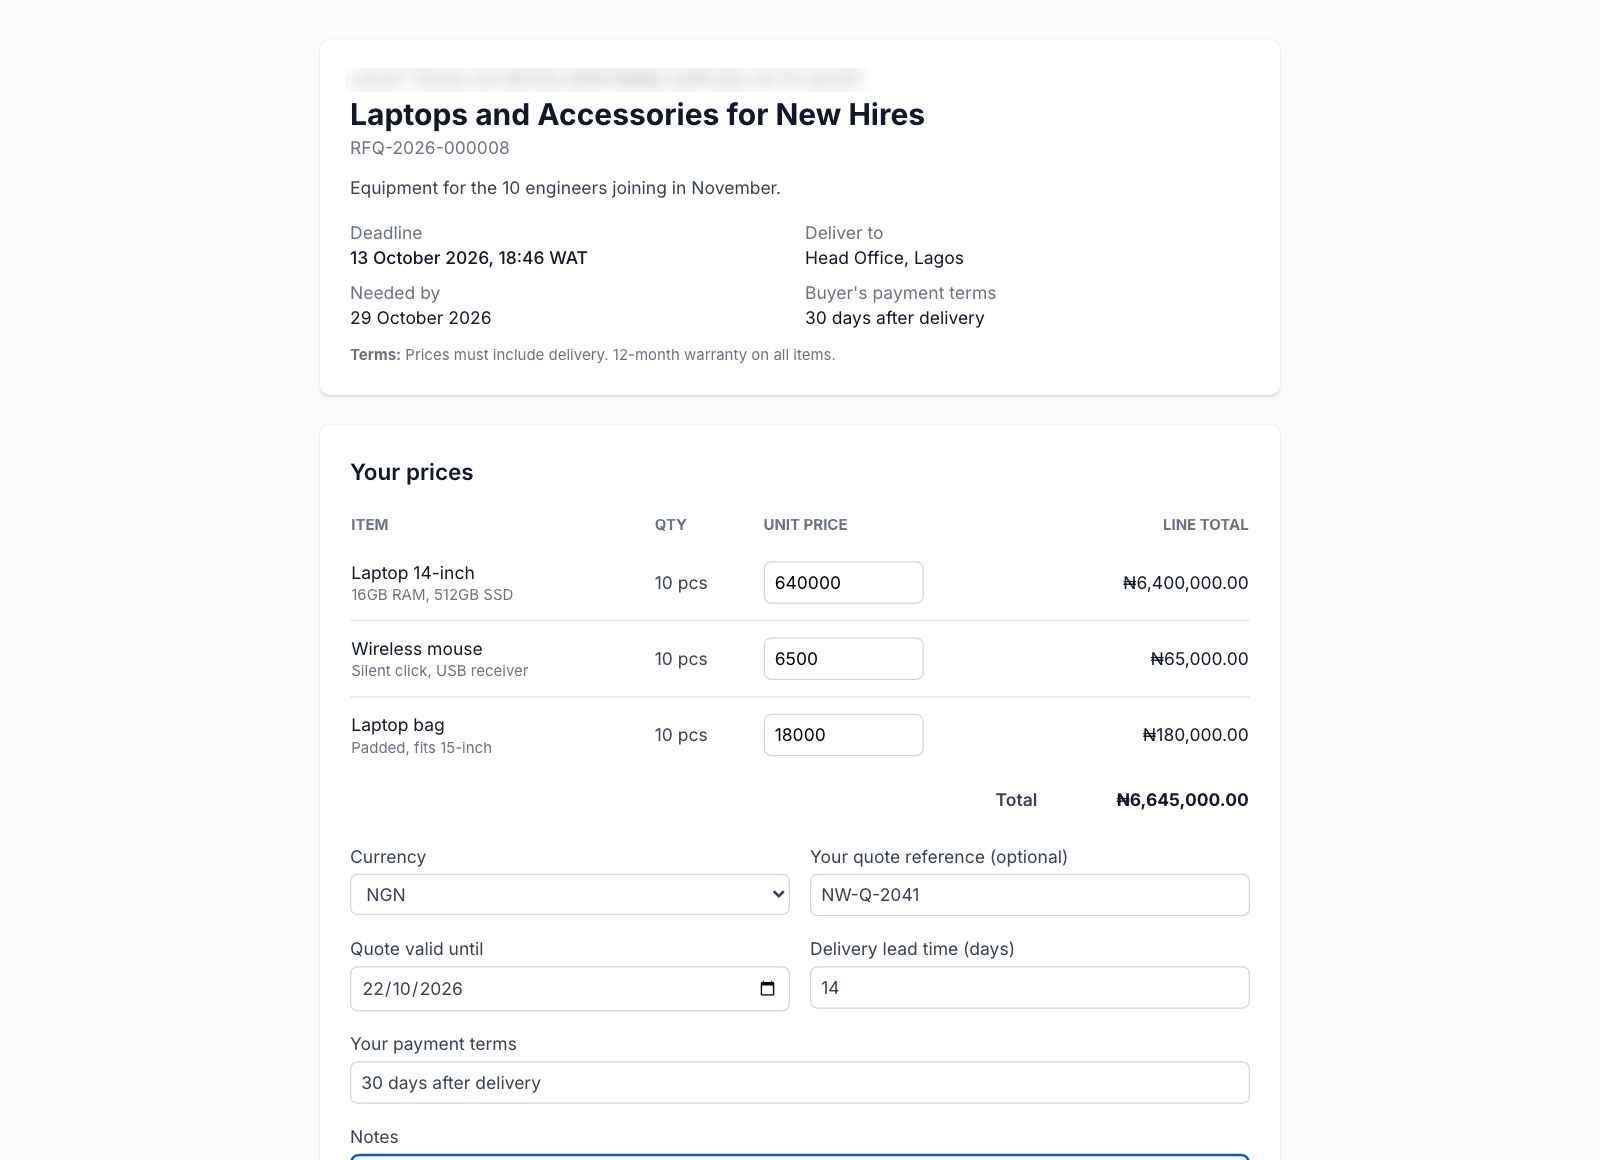
Vendors open their private link and fill in a short form: a unit price for each item, the quote's currency and validity, delivery lead time, their payment terms and any notes. They can attach a PDF quotation, revise their quote until the deadline, or decline politely.
- Vendor replied by phone or email? Use Record quote on the RFQ to enter it for them.
- Track responses — the RFQ shows who has responded; resend a link if a vendor lost it.
- Close early or extend — the RFQ also closes by itself at the closing date.
Select Compare & award to see every quote side by side. The lowest price on each line and the lowest total are highlighted, along with the fastest lead time, payment terms, notes and attachments.
- Vendors that declined or did not respond are greyed out.
- When vendors quote in different currencies, amounts are converted so you can compare like with like.
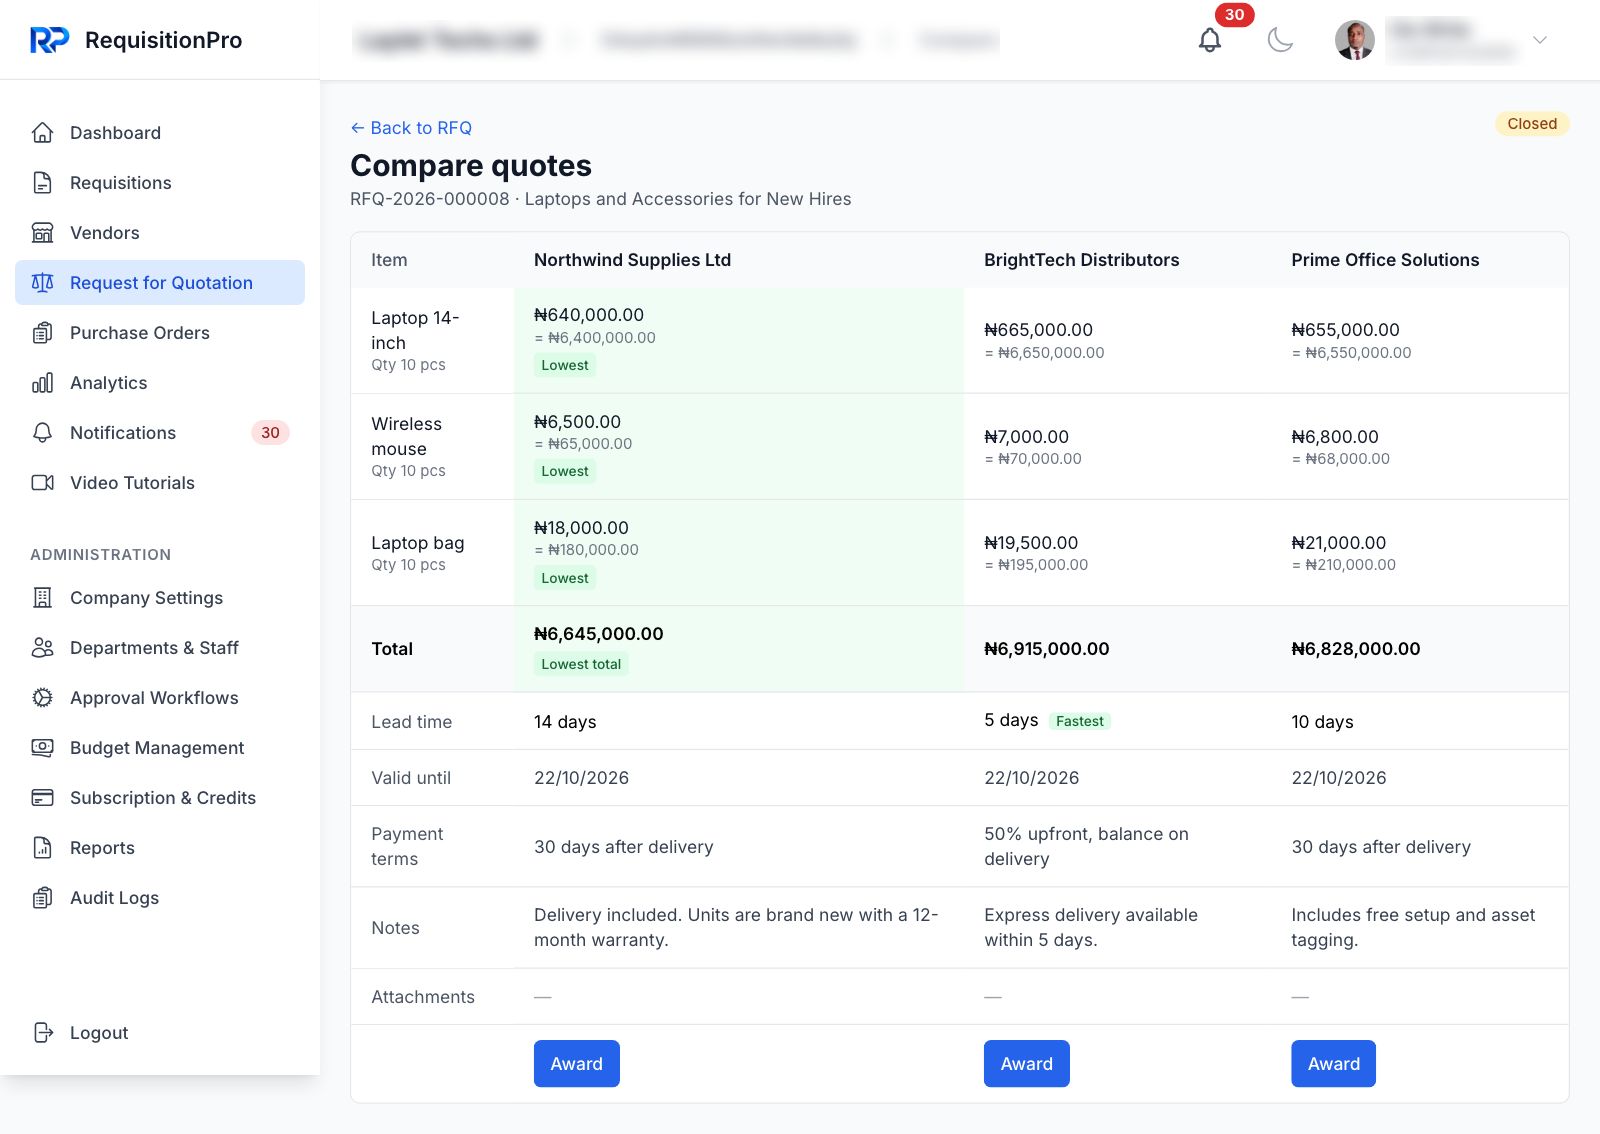
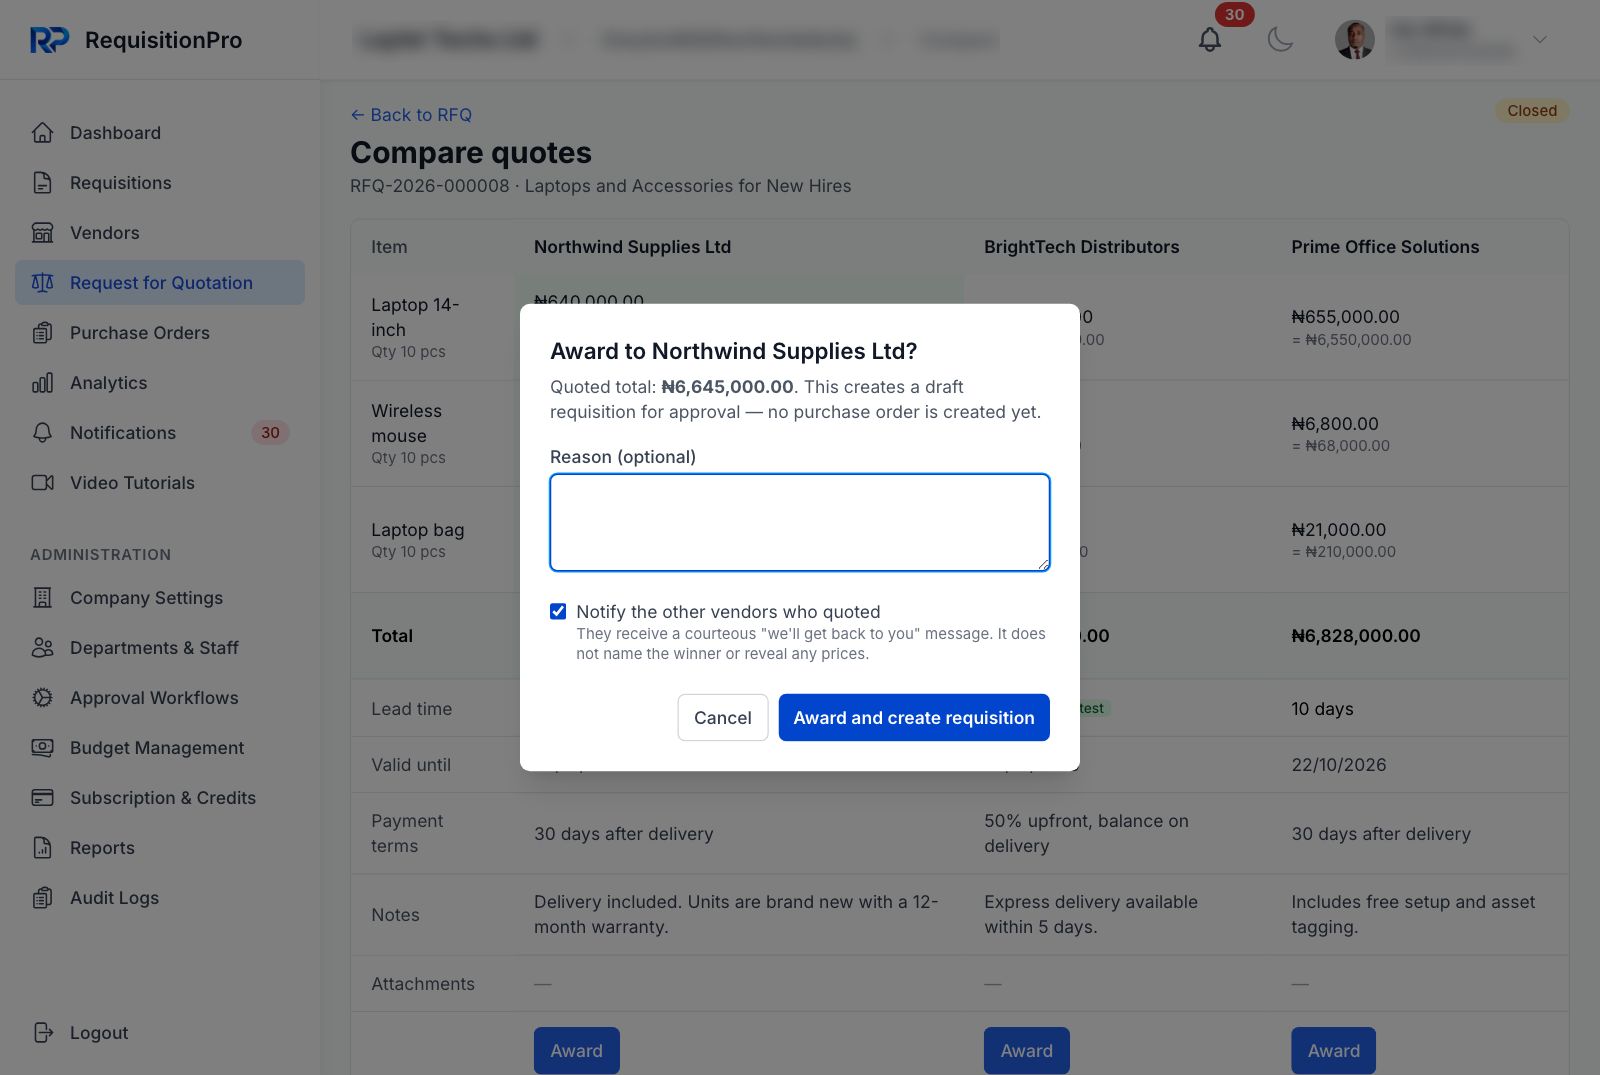
Choose a vendor and select Award. Add a short reason — it is required when you pick a vendor that is not the lowest bidder, which keeps your approvals honest.
- One vendor wins the whole RFQ.
- Notify the other vendors (optional) — they get a courteous "we'll get back to you" message that names no winner and shares no prices.
- Awarding creates a draft requisition, not a purchase order.
The new draft requisition is pre-filled with the winning vendor, your items and the quoted prices, and its justification lists every quote that was received. Review it and Submit for Approval — from here it follows your normal approval workflow and then becomes a purchase order.
- Rejected or cancelled? Reopen the RFQ and award a different vendor.
- Approved? The award is then sealed — the RFQ keeps a permanent record of the decision.